Montag, 28. September 2020

♥ DT Magengo - Time to read / You are so special to me ♥

 Hi everyone,

I wish you a happy Monday and I'm really glad to see you here again on my blog.

Today I'm on the Magengo blog and show you a new card and a tag with the cute Read more Digital stamps.

I must admit, that these stamps reminds me on my childhood, when my mother read to me every evening my favorite books. This was the best time of the day and I really love this time.

I start my card and the tag with creating a background with Distress Oxide Wild Honey and Aged Mahagony. Then I add some golden splahes on the background and let it dry.

I printed the images out with my laser printer and colored them with my Copic Marker. I fussy cut them out with my scissors and glue them on my backgrounds. For the cute bears I use Foam tape for a bit more dimension. I stamp the sentiment directly on the card and on the carpet some little flowers.  

I really love this cute scene and I hope you like it also. You'll find the Read More stamp set here in the shop.

Many thanks for stopping by and hope to see you soon here on my blog. Have a wonderful day.


Freitag, 25. September 2020

♥ ATC Verrückte - Kartentausch September - Herbst ♥

 Hallo Ihr Lieben, 

ich wünsche Euch einen schönen Freitag und freue mich sehr, dass Ihr heute wieder hier auf meinem Blog vorbei schaut.

In er Facebook Gruppe der #ATC Verrückten gab es im September wieder einen Kartentausch, diesmal mit dem Thema Herbst.

 Da meine Karte nun angekommen ist, kann ich sie Euch nun hier auch endlich zeigen.

Ich habe mich bei der Karte für das Harvest Mice Stempelset von Sunny Studio entschieden.


Den Hintergrund habe ich mit den Distress Oxide Fossilized Amber, Dried Marigold und Worn Lipstick gestaltet. Für den Rasen/ Gras habe ich Shabby Shutters und Peeled Paint verwendet. Ausgestanzt habe ich den Hintergrund mit der Meadow Backdrop Portrait Stanze von Lawn Fawn und auf meine weiße Grundkarte geklebt. Die Motive aus dem Sunny Studio Stamps  Harvest Mice Stempelset habe ich mit Copics coloriert und ausgeschnippelt. Für die Wolken habe ich die Cute Cloud Outlines Stanze verwendet. Den Rasen habe ich dann für ein bisschen Abstand noch ein zweites mal ausgestanzt, wieder mit Shabby Shutters und Peeled Paint eingefärbt und aufgeklebt. Die Motive habe ich zum Teil mit Foam Tape aufgeklebt. Den Text habe ich mit meinem Misti Tool direkt aufgestempelt. Zusätzlich zur Karte habe ich noch ein kleines Tag mit den Süßen Mäusen gewerkelt.

Nun sage ich Danke für Euren Besuch und wünsche ich Euch noch einen schönen kreativen Tag. Tschüssi und bis bald.

Sonntag, 20. September 2020

♥ DT Stamp Corner - Challenge #36 Halloween ♥

 Hallo Ihr Lieben,

ich wünsche Euch einen schönen Sonntag Abend und freue mich sehr, dass Ihr wieder hier auf meinem Blog vorbei schaut.

Heute starten wir eine neue Challenge auf dem Blog von Stamp Corner

 
Für die Challenge #36 heißt es 

Halloween

Zeigt uns Eure Werke auf dem Challengeblog, wir sind schon ganz gespannt was Euch einfällt. Natürlich habt Ihr auch diesmal wieder die Chance etwas zu gewinnen.

2x

einen 10,- Euro Gutschein

für den Shop www.stampcorner.de

Also, mitmachen und einen von 2 Gutscheinen gewinnen

Ihr habt nun bis zum 20.10.2020, 23:59 Uhr Zeit uns im Kommentarfeld Euren Bloglink/Instagram/Facebooklink oder ein Foto von Eurem Werk zu posten.

Die Regeln findet Ihr hier.

Ich habe mich für eine Slimline Karte mit Stempeln von Lawn Fawn entschieden.


 Den Hintergrund habe ich mit Distress Oxides Seedless Preserve, Wilted Violet, Dusty Concord und Black Soot gestaltet und nach dem trocknen mit der Large Slimline with Slider Stanze von Lawn Fawn ausgestanzt. Für den schwarzen Hügel habe ich eine Stanze aus dem Slimline Stitched Hillside Borders Set verwendet. Die Motive aus dem Spooky Village und Fox Costumes Before 'n Afters Set habe ich mit Copics coloriert, ausgeschnippelt und zum Teil mit Foam Tape aufgeklebt.

So Ihr Lieben, nun seid Ihr wieder an der Reihe. Ihr habt nun bis zum 20.10.2020, 23:59 Uhr Zeit uns im Kommentarfeld Euren Bloglink / Instagram / Facebooklink oder ein Foto von Eurem Werk zu posten. Wir freuen und schon sehr auf Eure Werke.

 Nun wünsche ich Euch noch einen schönen Tag, lasst es gut gehen und passt auf Euch auf.
Tschüssi bis bald.


Samstag, 19. September 2020

♥ DT Magengo - Hi there ! ♥

 Hi everyone, 

I wish you a happy Saturday and I'm really glad to see you here again on my blog.

Today I'm here with my new Design Team card for Magengo.

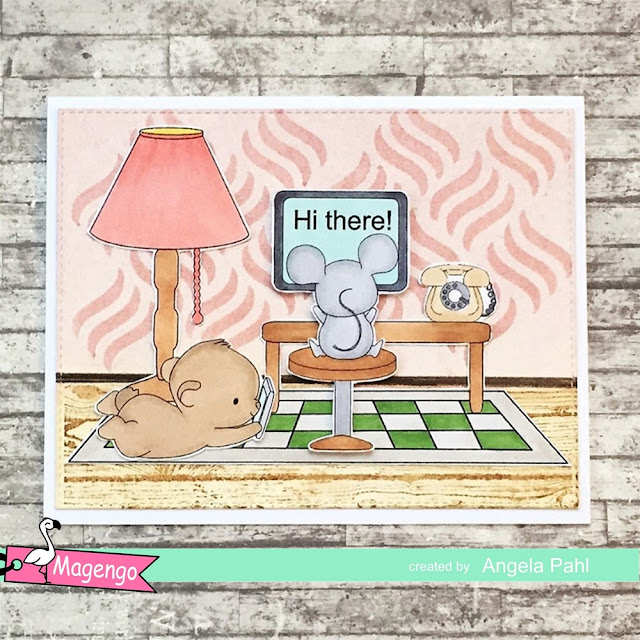
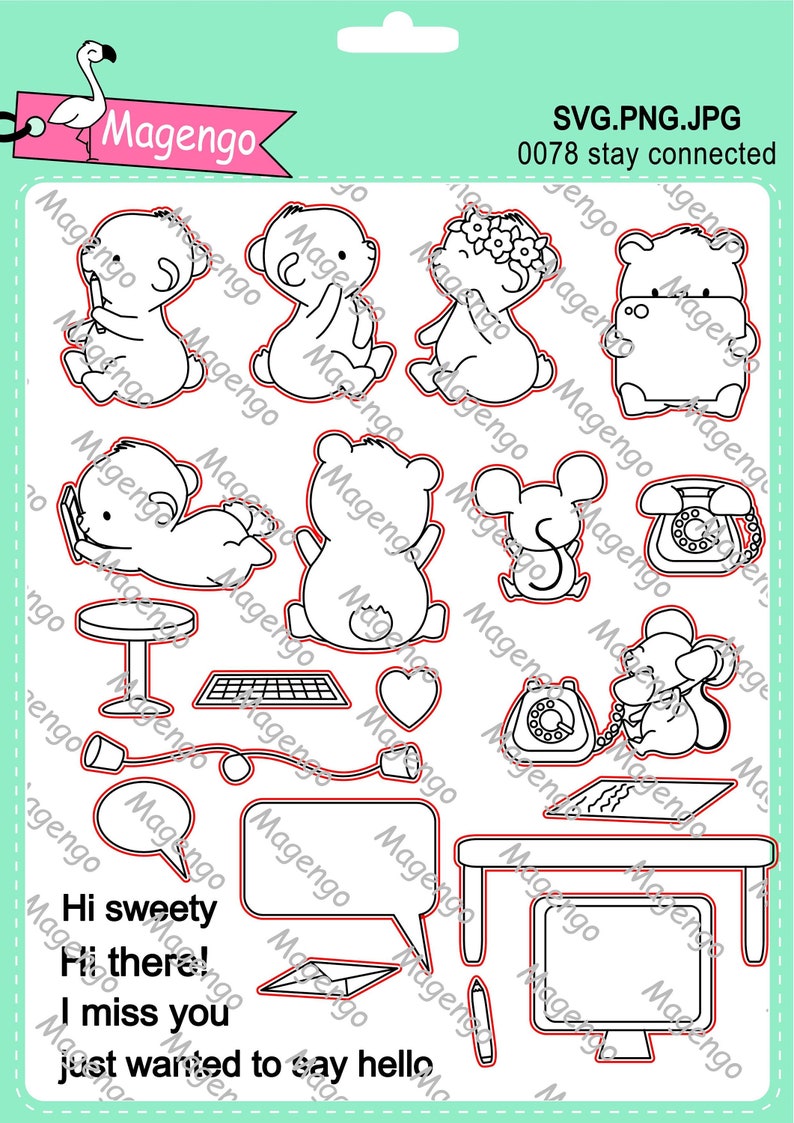
I show you a new card with the cute Stay Connected Digital stamps from the September 2020 release.

I start my card with creating the background. I cut out a panel with a rectangle die and ink the bottom with Distress Ink Tea Dye. Then I stamp the wooden floor on the bottom and use a pencil for the skirting board. I inked the rest of the panel with Distress Ink Milled Lavender. I use a stencil and Distress Ink Victorian Velvet for the wallpaper pattern. I put my background aside for drying.

In the meantime I printed out the images, color them with Copic Markers and fussy cut the images out with my scissors. I glue the images with liquid glue and Foam tape on my background and then on a white card base.

I really love this cute scene and hope you like it also. You'll find the stamps here in the Magengo Shop.

Bleiben Sie verbunden digitale Stempel-Set Svg-Dateien image 0

Many thanks for stopping by and I hope to see you soon here on my blog. Have a great day.

Freitag, 18. September 2020

♥ DT Stamp Corner - Fühl Dich gedrückt / Mandala Karte ♥

 Hallo Ihr Lieben,

ich wünsche Euch einen schönen Freitag und freue mich sehr, dass Ihr heute wieder hier auf meinem Blog vorbei schaut.

Heute zeige ich Euch auf dem Blog von Stamp Corner eine für mich etwas untypische Karte. Aber auch nicht niedliche Karten braucht man ja ab und zu, einfach mal um jemandem zu zeigen, dass man an ihn denkt. Das Mandala von Stamp Corner eignet sich perfekt für diese Karte.


Den Hintergrund habe ich mit dem Nuvo Atlantis Burst Shimmer Powder gestaltet. Nach dem trocknen habe ich das Mandala mit dem VersaMark Stempelkissen auf den Hintergund gestempelt und mit weißem Embossingpulver heiß embosst. Den Text habe ich mit Hilfe einer Stempelhilfe direkt in die obere rechte Ecke gestempelt. Ausgestanzt habe ich den Hintergrund mit der My Favorite Things Stitched Scallop Rectangle Framed Die-namics und anschließend auf meine weiße Grundkarte aus dem Perfect Colouring Paper geklebt. Die Herzen habe ich mit einer Lawn Fawn Stanze aus dem Tropical Shimmer Cardstock gestanzt. Zum Schluss habe ich noch ein paar bronzene Glitzersteine aufgeklebt.

Nun sage ich Danke für Euren Besuch und wünsche ich Euch noch ein kreatives Wochenende. Tschüssi und bis bald.

Materialliste:


Donnerstag, 17. September 2020

♥ My Favorite Things - Adventure card for Card Design Superstar 2020 ♥

 Hi everbody,

I wish you a happy Thursday and I'm really glad to see you here again on my blog.

Today I show you my another card for the

My Favorite Things
2020 Card Design Superstar contest

With this little scene card I'll take part of the Coloring Virtuoso categorie.

I use the Adorable Adventures stamp set for my card. 


I create a background with Distress Oxides Dried Marigold, Picked Raspberry, Abandoned Coral, Vintage Photo and cut it out with the Stitched Scallop Rectangle Framed Die-namics. Then I cut out two grass hills with the Tucked in Turf Vertical Die-namics. I inked the hills with Distress Oxides Shabby Shutters and Peeled Paint and glue them on my background.

I color the images with my Copic Markers and fussy cut them out with my scissors. I glue the images with Foam tape on the background and then the background on my white card base. I stamp the sentiment with my Misti Tool directly on the card. For the last step I cut out three little clouds with the Cute Cloud Outlines Die-namics, color them with Copics and glue them on the card.

I'm really happy how the card looks like and so I'll take part of the
 
My favorite Things Card Design Superstar Contest

 Many thanks for stopping by and I hope to see you soon here on my blog. Have a great day.♥ 


Montag, 14. September 2020

♥ My Favorite Things - Sending Bundles of Hugs for 2020 Card Design Superstar 2020 ♥

 Hi everybody,

I wish you a happy Monday and I'm really glad to see you here again on my blog.

Today I show you my first card for the  

2020 Card Design Superstar contest 

from My Favorite Things
 

 On this contest you can join three different categories with your creations: 

Clean & Simple Genius, Coloring Virtuoso and Innovation Master.
 
With this card I'll take part of the Clean & Simple Genius categorie.

For this card I use the Rectangle Trio Stencil and ink the background with Distress Oxide  Shabby Shutters, Carved Pumpkin and Fossilized Amber. Then I cut it out with the
My Favorite Things Wonky Stitched Rectangle STAX Die-namics and glue it with Foam Tape on my white card base. I stamp the sentiment with my Misti Tool directly on the top pf the card. I color the images from the BB Fall Friends Stamp Set with my Copic Marker, fussy cut them out with my scissors and glue them with liquid glue and Foam tape on the card. 
 
I'm really happy how my card looks like and so I'll take part of the 

My favorite Things Card Design Superstar Contest 
 

Many thanks for stopping by and I hope to see you soon here on my blog. Have a great day.♥ 

Freitag, 11. September 2020

♥ DT Stamp Corner - Pinguin Slimline Karte ♥

Hallo Ihr Lieben,

ich wünsche Euch einen schönen Freitag und freue mich sehr, dass Ihr heute wieder hier auf meinem Blog vorbei schaut. 

Heute zeige ich Euch auf dem Blog von Stamp Corner eine Slimline Karte mit den süßen Stempeln aus dem Stamp Corner Pinguin Set.


Ich liebe ja die Slimline Marquee Stanze von Whimsy Stamps und wollte unbedingt die süßen Stamp Corner Pinguine noch einmal verwenden. Für den Hintergrund habe ich auf einem Stück Perfect Colouring Paper das mittlere Fenster markiert und in diesem Fenster die Schneeflocken aus dem Set mit VersaMark Ink gestempelt und mit weißem Embossingpulver heiß embosst. Anschließend habe ich den Hintergrund mit Distress Oxide Faded Jeans und den Rand nochmal mit Chipped Sapphire eingefärbt und auf meine weiße Grundkarte geklebt. Die Pinguine habe ich mit Copics coloriert, ausgeschnitten und mit Foam Tape in die Öffnungen geklebt. Den Text habe ich mit VersaMark auf schwarzen Cardstock gestempelt und ebenfalls mit weißem Embossingpulver heiß embosst. Damit er in das mittlere Fenster passt, habe ich den Text einfach geteilt und schräg abgeschnitten. Zum Schluß habe ich noch ein paar  Nuvo Drops Ivory Seashell und zwei größere Perlen aufgeklebt.

Nun sage ich Danke für Euren Besuch und wünsche ich Euch noch ein kreatives Wochenende. Tschüssi und bis bald.

Materialliste:

Donnerstag, 10. September 2020

♥ DT Magengo - September release / DING, DONG, The school bell rings ♥

 Hi everybody,

I wish you a happy Thursday and I'm really glad to see you here again on my blog. 

Today I'm really nervous, because this is my first posting as an official Design team member from the Magengo family.

For today I show you a card with the cute Run To school Digital stamp set from the September 2020 release.

I start my card with creating the digital stamps for printing. I use Microsoft Word to create the school house and the trees and arrange them together, so they fits perfect to my card. I also reduce the cute critters a little bit so they fits perfect to the school house. As I color all my images with Copic Markers I use my laser printer for printing the images. I fussy cut them out with a scissor. Then I create my background with Distress Oxides and a cloud stencil.  For the grass I use a hill die and a grass border die and ink the grass also with Distress Oxides. I cut out the cloud background with a rectangle die and glue the hill and the gras border on the background. 
I glue the school house and the critters with Foam tape on my card. Then I decided to print some more  grass, color it with Copics, fussy cut them out and glue them on my card. For the sentiment which is also include in the Run to school set I use a banner die and glue it on top of my background. I glue all on my white card base and for the final step I glue some rhinestones on the card.
 
I'm really happy how the card looks like and I hope I can inspire you a little bit.
Thanks for stopping by, hope to see you soon. Have a great day.


Montag, 7. September 2020

♥ DT AAA Birthday Challenge - Animals & Critters ♥

 Hi everybody,
I wish you a happy Monday and I'm really happy to see you here again on my blog.

Today we start a new challenge at the

AAA Birthday Challenge

For this challenge we want to see Animals or Critters on your card, but remember it must be a birthday card. You can take part of this challenge until the 4th.October and we can't wait to see your creations.

For my card I use the cute stamps from Heffy Doodle.

I create a Distress Oxide background with Dried Marigold and Carved Pumpkin and cut it out with a rectangle die from Heffy Doodle. Then I cut out a little sand hill with a die from Lawn Fawn Slimline Stitched Hillside Borders. I inked the hill with Tea Dye and Antique Linen. For the waves I use Salty Ocean and Mermaid Lagoon and cut them out. Then I cut all out with the rectangle die from Heffy Doodle, so it fits perfectly to my background.  I color the images with my Copics and fussy cut them out with a scissors and glue them on my card. For some images I use Foam Tape for a bit more dimension. I stamp the sentiment with my Misti Tool directly on the card and I'm really happy how the card looks like.

Now it's your turn to join our new challenge, hope to see your creation there.
So that's it for today. Many thanks for stopping by and I hope to see you soon here on my blog. Have a great day.

Sonntag, 6. September 2020

♥ DT Stamp Corner - Pinguin Spaß ♥


Hallo Ihr Lieben,

ich wünsche Euch einen schönen Sonntag und freue mich sehr, dass Ihr heute wieder hier auf meinem Blog vorbei schaut.

Heute zeige ich Euch auf dem Blog von Stamp Corner meine erste Karte mit dem neuen Pinguin Stempel Set. Habt Ihr sie schon im Shop entdeckt? Ich finde die kleinen Kerlchen ja zu knuffig.


Für den Hintergrund habe ich ein Stück Perfect Colouring Paper mit den Schneeflocken aus dem Pinguin Set mit VersaMark Ink bestempelt und mit weißem Embossingpulver heiß embosst. Nach dem der Hintergrund abgekühlt war, habe ich ihn mit Distress Oxide Chipped Sapphire und Faded Jeans eingefärbt und mit einer rechteckigen Stanze aus meinem Bestand ausgestanzt. Für den Eishügel habe ich ein Stück Perfect Colouring Paper mit Distress Oxide Tumbled Glass eingefärbt und mit einer Stanze aus dem Lawn Fawn Stitched Hillside Borders Set ausgestanzt. Für den weißen Rahmen habe ich die My Favorite Things Stitched Scallop Rectangle Framed Die-namics verwendet. Die Motive habe ich mit Copics coloriert und mit der Schere ausgeschnitten. Den Pinguin auf der Eisscholle habe ich mit 1mm Foam Dots aufgeklebt, für die anderen Motive habe ich den Tombow Multi Talen Liquid Glue verwendet. Auf die Tannenbäume habe ich noch bronze farbene Glitzersteine aufgeklebt. Den Text habe ich mit einer Stempelhilfe direkt auf die Karte gestempelt.

Nun sage ich Danke für Euren Besuch und wünsche ich Euch noch einen schönen kreatives Wochenende. Tschüssi und bis bald.

Materialliste:

Samstag, 5. September 2020

♥ DT Stempelgarten - Challenge 96 - Im Wald ♥

 Hallo Ihr Lieben,

ich wünche Euch einen schönen Samstag und freue mich sehr, dass Ihr heute wieder hier auf meinem Blog vorbei schaut.

Heute ist es wieder soweit und wir starten eine neue Challenge auf dem Blog der

Stempelgarten Challenge

Unser Thema im September lautet 

Im Wald

Perfekt für die ersten Herbstkarten, oder?

Natürlich könnt Ihr auch diesmal wieder ein ein tolles Bastelpaket im Wert von über CHF 20.00 gewinnen. 


Für meine Karte habe ich mich für das süße Eichhörnchen von Gerda Steiner Designs entschieden.

Den Hintergrund habe ich mit Distress Oxide Shabby Shutters, Dried Marigold und Carved Pumpkin eingefärbt. Die schmalen Bäume habe ich mit der Winter Forest Cover Stanze von Mama Elephant ausgestanzt und mit Distress Ink Antique Linen eingefärbt. Für die Grundkarte habe ich die My Favorite Things Stitched Rectangle Scallop Frames Die-namics und die Double Stitched Circle Stax Die-namics verwendet. Die Motive habe ich mit Copics coloriert und zum Teil mit Foam Dots aufgeklebt. Den Text habe ich wieder mit dem Misti Tool direkt auf die Karte gestempelt. Zum Schluss habe ich noch ein paar Sequins aufgeklebt.
 
So nun seid Ihr wieder an der Reihe. Zeigt uns Eure kreativen Werke, wir sind schon ganz gespannt auf Eure Umsetzungen. 

Nun sage ich Danke für Euren Besuch und wünsche ich Euch noch einen schönen kreatives Wochenende. Tschüssi und bis bald.

Donnerstag, 3. September 2020

♥ ATC Tausch August / ATC Verrückte / Thema Lawn Fawn ♥

 Hi everybody,

I wish you a happy Thursday and I'm really glad to see you here again on my blog.

Today I show you some ATC's which I made for the monthly swap with the girls from the #ATC Verrückte

For August we use the topic

Lawn Fawn

  For this swap we only use the stamps from Lawn Fawn.


For my ATC's I use many different stamp sets and create different backgrounds. I color all images with my Copics, Tri Blend Markers and fussy cut them out with my scissors. For the backgrounds I use Distress Oxides.

Many thanks for stopping by and I hope to see you soon here on my blog. Have a great day.

Dienstag, 1. September 2020

♥ DT Sparkles Christmas Challenge - Challenge #116 / Festive Things with Wings ♥

 Hi everybody,

I wish you a happy Tuesday and I'm really glad to see you here again on my blog.

Today we start a new challenge at the

Sparkles Christmas Challenge

 
For this challenge we have the topic
Festive Things with Wings 

For my card I use the cute owls from Sunny Studio Stamps and make a Distress Oxide background.
I start my card with creating the Distress Oxide background with Tumbled Glass, Peacock Feathers and Chipped Sapphire. I added some splashes of white acrylic paint on the background and let it dry. In the meantime I cut out a white frame with the My Favorite Things Stitched Rectangle Scallop Frames Die-namics and put it aside. Then I color my images from the Happy Owlidays stamp set from Sunny Studio Stamps with my Copics and fussy cut them out with my scissors. After my background is dry I cut it out with a die from Heffy Doodle and glue it on my card base. I glue the white frame and all images on the background. For the lower owl I use Foam Tape for more dimension. I stamp the sentiment with my Misti Tool directly on the card. For the final touch I glue some white sequins on the card and I'm really happy how this christmas card looks like. Do you start with creating christmas cards right now?

Many thanks for stopping by and I hope to see you soon here on my blog. Have a great day.