Mittwoch, 31. Mai 2023

♥ Lawn Fawnatics - Challenge #149 Dies Only ♥

 Hi everyone,

I wish you a happy Wednesday and I'm really glad to see you here again on my blog.

Today I show you my new card for the current

Lawn Fawnatics Challenge #149 / Dies Only


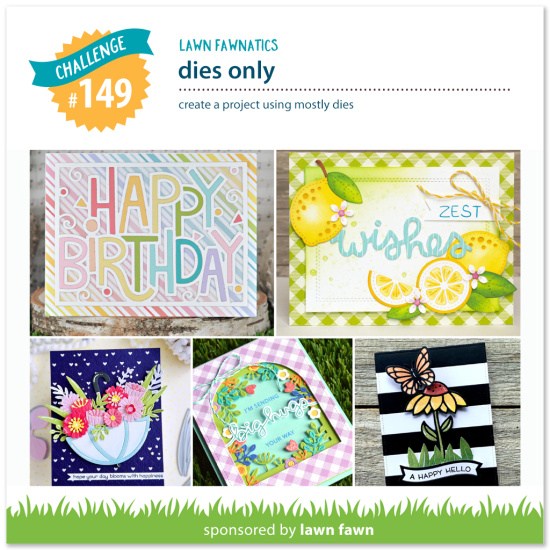
For this card I use 5 different dies and create a rainbow background.

I start the card with creating 9 different pieces of Bristol Cardstock with Distress Oxides: Spun Sugar, Picked Raspberry, Carved Pumpkin, Fossilized Amber, Shabby Shutters, Tumbled Glass, Mermaid Lagoon, Chipped Sapphire and Wilted Violet

After the backgrounds are dry I cut them out with the Lawn Fawn Simple Stripes Diagonal Die.


Then I glue the different stripes on a piece of white cardstock. After that I add some golden Coliro Pearlcolor splashes on the background and let it dry. In the meantime I cut out a white frame and glue it on the dry background. I cut out the HOORAY for several times with white cardstock and glue them together. I glue a glitter cardstock HOORAY on top and then all on the card background. I also cut out two little hearts with glitter cardstock and glue them also on the background.


 I stamp the It's your birthday sentiment with a Versamark embossing pad and use white embossing powder for heat embossing. For the last step I glue the background on a piece of black cardstsock and then on my white card base.

With my card I'll take part of the challenge: 


Many thanks for stopping by and I hope to see you soon here on my blog. Have a great day.

Dienstag, 30. Mai 2023

DT Magengo - Fly with me stamp set / Liebe über den Wolken ♥

 Hi everyone,

 I wish you a happy Tuesday and I'm really glad to see you here again on my blog.♥  

Today I show you another inspiration card for the Magengo Designs Team. For my new card I use the Fly with me stamp set from the new Summer 2023 release.

 I cut out a rectangle of Bristol cardstock with the In-out stitched rectangles dies and use Distress Oxide Tumbled Glass for inking the background. Then I lay the Fluffy cloud stencil over the rectangle and use Distress Oxide Peacock Feathers for creating the cloudy background. Then I cut out a grass border with the Grass borders Die cut set and use Distress Oxide Mowed Lawn for inking. I glue the grass border on the cloud background and then all on my white card base.


I stamp the images on a Copic friendly paper and color the images with my Copic Markers. I fussy cut them out with my scissors and glue them with Foam Tape and with liquid glue on the background. I stamp the sentiment with my Misti Tool directly on the card. For the flowers I use a flower punch of my stash and add some little rhinstones on the flowers.

Many thenks for stopping by and hope to see you soon here on my blog.


Sonntag, 28. Mai 2023

♥ DT Stamp Corner - Vorschau Nr. 2 Juni Release / Du & Ich = Freunde ♥

 Hallo Ihr Lieben,

ich wünsche Euch einen schönen Pfingstsonntag und freue mich sehr, dass Ihr heute wieder hier auf meinem Blog vorbei schaut.

Am Donnerstag erscheint ja der neue Release im Stamp Corner Online Shop und ich zeige Euch heute eine Karte, bei der ich 3 Produkte aus dem neuen Release  verwendet habe.

Für die Karte habe ich ein Stück Bristol Cardstock mit Distress OxideTumbled Glass eingefärbt und mit einer Stanze aus dem neuen Release ausgestanzt. Für das Gras habe ich Cardstock mit Distress Oxide Mowed Lawn eingefärbt und mit einer Grasstanze aus meinem Bestand ausgestanzt und auf den blauen Hintergrund geklebt und anschließend den Hintergund auf meine weiße Grundkarte geklebt.

Den süßen Elefant aus dem neuen Stempelset habe ich mit Copics koloriert, mit der Schere ausgeschnitten und mit Foam Dots aufgeklebt. Unter den Elefanten habe ich ebenfalls eine Neuheit aus dem neuen Release verwendet. Den Schriftzug Freunde habe ich aus weißem Cardstock  und aus pinkfarbenen Cardstock ausgestanzt und leicht versetzt übereinander geklebt.Die Herzen sind mit einer My Favorite Things Stanze ausgestanzt, genauso wie die Schmetterlineg. Den Text Du & Ich findet Ihr im Stamp Corner - Stempel Set - Kleine Worte. Zum Schluss habe ich noch ein paar kleine Glitzersteine aufgeklebt.

Nun wünsche ich Euch noch einen schönen Sonntag,Tschüssi und bis nächsten Sonntag.

Freitag, 26. Mai 2023

♥ DT Stamp Corner - Vorschau auf den Juni Release ♥

 Hallo Ihr Lieben,

ich wünsche Euch einen schönen Freitag und freue mich sehr, dass Ihr heute wieder auf meinem Blog vorbei schaut.

Heute zeige ich Euch eine Karte mit einem neuen Produkt aus dem Juni Release von Stamp Corner. Ihr könnt Euch wirklich freuen, es gibt tolle neue Produkte.

Für meine Karte habe ich ein Stück Bristol Cardstock mit einer rechteckigen Stanze (ab dem 01.06.2023 neu im Shop erhältlich) ausgestanzt. Darauf habe ich das Sternen Stencil von Stamp Corner gelegt und mit Distress Oxide Dried Marigold eingefärbt. Zusätzlich habe ich noch ein Stück Cardstock zurecht geschnitten und den Rand ebenfalls mit Distress Oxide Dried Marigold und darauf den Sternen Hintergrund geklebt und anschließend alles auf meine weiße Grundkarte.

Den süßen Bär aus dem Stamp Corner - Stempel Set - Bärliset habe ich mit Copics koloriert, mit der Schere ausgeschnitten und mit Foam Dots aufgeklebt. Den Text aus dem Stamp Corner - Stempel Set - Kleine Worte habe ich auf einen schmalen Streifen Cardstock gestempelt, schräg abgeschnitten und ebenfalls mit Foam Dots aufgeklebt.

Schaut unbedingt bei meinen DT Kolleginnen auf Instagram und in der Stamp Corner Facebook Gruppe  vorbei, dort gibt es auch super schöne Werke zu sehen.

Nun wünsche ich Euch noch einen schönen Freitag, lasst es Euch gut gehen, Tschüssi und bis bald.

Donnerstag, 25. Mai 2023

♥ Lawn Fawn - Hello Sunshine Slimline Card ♥

 Hi everyone,

I wish you a happy Thursday and I'm really glad to see you here again on my blog.

Today I show you my first card with the Giant Hello Sunshine die from the new Lawn Fawn Release. I was inspired for my slimline card by the talented Tammy. I really love her adorable creations.

 I start my card with stamping the images from the Lawn Fawn Beary Rainy Days stamp set, color them with my Copic Marker and fussy cut them out with my scissors. Then I cut out a piece of Bristol cardstock with the Lawn Fawn slimline die and use Distress Oxide Tumbled Glass and Peacock Feathers for blending. If I'm happy with the result, I add some Coliro Pearlcolor splashes on the background and glue the backgound on my white card base..

 I cut out the Giant Hello Sunshine with Perfect Colouring Paper and glue it on the background. I color the inside of the sunshine letters with Copics and glue them on the card. Then I arrange the images on the backgound and glue them with liquid glue and with Foam Tape on the card. For the last step I add some white Enamel Dots on the card.

Many thanks for stopping by and I hope to see you soon here on my blog. Have a great day.

Mittwoch, 24. Mai 2023

♥ DT Magengo - Sneak Peak New Release - Have a Bright Night ♥

 Hi everyone,

today is the second day of the Show and Tell Days for the new Magengo Designs Release.

For my card today I use the Bright Night stamp set. I start with creating the background and cut out a rectangle with the In-out stitched rectangles dies. I also cut out a grass border with the Grass Border dies and use Distress Oxide Mowed Lawn for inking. I also add some green Coliro Pearlcolor splashes on the grass border. Then I ink the stitched rectangle with Distress Oxide Prize Ribbon and Uncharted Mariner. For the fireflies I add some Distress Oxide Fossilized Amber. I also add some golden Coliro Pearlcolor splashes on the background. I glue the grass border on the background and then all on my white card base.


 I color the images with my Copic Marker, fussy cut them out with my scissors and glue some with liquid glue and some with Foam tape on the card. I stamp the sentiment with VersaMark Ink on a small stripe of black cardstock and use white embossing powder for heat embossing. I glue it with liquid glue on the card and I'm really happy how the card looks like.

Many thanks for stopping by and hope to see you soon here on my blog.

Dienstag, 23. Mai 2023

♥ DT Magengo - Sneak Peak New Release - Lucky You Are My Mom ♥

Hi everyone,

I wish you a happy Tuesday and I'm really glad to see you here again on my blog.

Todas is a very special day, because we start the Show and Tell Days for the new Magengo Designs release.

For my card today I use the Lucky You Are My Mom stamp set and the Grass Border dies and the In-out stitched rectangles dies.

 I start as always with creating the background. I blended a piece of Bristol cardstock with Distress Oxide Dried Marigold and Picket Raspberry. If I'm happy with the result I cut it out with the In-out stitched rectangles dies and put them aside. Then I cut out two grass borders with the Grass border dies and blend one with Distress Oxide Mowed Lawn and the other one with Distress Oxide Peeled Paint and glue them both on my background and then on my white card base.


I color all images with my Copic Marker, fussy cut them out with my scissors and glue them with liquid glue and with Foam Tape on the card. I stamp the sentiment with my Misti Tool directly on the background. For the last step I glue some butterflies with rhinestones on the background. 

Many thanks for stopping by and hope to see you soon here on my blog.

Sonntag, 21. Mai 2023

♥ DT Stamp Corner - Dein Herz ist bei mir sicher ♥

 Hallo Ihr Lieben,

ich wünsche Euch einen schönen Sonntag und freue mich sehr, dass ihr heute wieder hier auf meinem Blog vorbei schaut.

Heute zeige ich Euch auf dem Stamp Corner Blog eine Karte mit dem süßen Stamp Corner - Stempelset - Glücksdrache, welches in Kooperation von Stamp Corner und Peaky Needles enstanden ist. Für die Karte habe ich ein Stück Bristol Cardstock mit der Wave Stanze ausgestanzt und mit Distress Oxide Tumbled Glass eingefärbt. Anschließend habe ich das Wolkenstencil von Lawn Fawn über den Hintergrund gelegt und mit Distress Oxide Peacock Feathers die Wolken aufgetragen. Dann habe ich die Wolken mit einer Stanze von Lawn Fawn aus Perfect Colouring Paper ausgestanzt und auf den Hintergrund geklebt.

Den süßen Drachen habe ich mit Copics koloriert, mit der Schere ausgeschnitten und mit Foam Dots aufgeklebt. Das süße Mädchen ist aus einem älteren My Favorite Things Stempel Set und ist ebenfalls mit Copics koloriert, ausgeschnitten und mit Foam Dots aufgeklebt. Den Text der sich ebenfalls im Glücksdrachen Stempel Set befindet, habe ich mit einer Stempelhilfe direkt in die Wolken gestempelt. Ein paar Simple and Basic - Enamel Dots Mint habe ich noch auf die weißen Wolken geklebt und im oberen Teil noch ein paar Nuvo Crystal Clear Drops aufgetragen, sowie kleine gestanzte Herzen. Zum Schluss habe ich alles auf meine weiße Grundkarte geklebt.

Nun wünsche ich Euch noch einen schönen Sonntag,Tschüssi und bis bald.

Samstag, 20. Mai 2023

♥ Dt Stamp Corner - Challenge #56 Sketch ♥

 Hallo Ihr Lieben,

ich wünsche Euch einen schönen Samstag und freue mich sehr, dass Ihr heute wieder auf meinem Blog vorbei schaut.

 Heute starten wir auf dem Stamp Corner Challenge Blog wieder eine neue 

Stamp Corner Challenge

Diesmal haben wir folgendes Thema für Euch

Sketch


Wir sind schon ganz neugierig, wie  Euch der Sketch gefällt und wie Ihr ihn umsetzt.

Ob Anfänger oder Fortgeschritten, jeder kann mitmachen und wir freuen uns über  alle Werke!

Bringt uns zum staunen!

 Zu Gewinnen gibt es auch wieder etwas:

2x

einen 10,- Euro Gutschein

für den Shop www.stampcorner.de

Also, mitmachen und einen von 2 Gutscheinen gewinnen!!!

Ihr habt nun bis zum 19.06.2023, 23:59 Uhr Zeit uns im Kommentarfeld Euren Bloglink / Instagram / Facebooklink oder ein Foto von Eurem Werk zu posten.

Die Regeln findet Ihr hier.

Wir freuen uns auf Eure tollen Werke.

Für meine Karte habe ich den Sketch einfach gedreht. Für den Hintergrund habe ich ein Stück Bristol Cardstock mit der Stamp Corner Deckle Frames Stanze ausgestanzt. Mit der Matschtechnik und Distress Oxide Peacock Feathers habe ich den Hintergrund eingefärbt und zusätzlich noch ein paar Coliro Pearlcolor Splashes aufgetragen. In der Mitte habe ich danach ein Streifen Designpaper aus dem Stamp Corner - Paper Pack - 04 aufgeklebt.


 Als Motive habe ich die beiden kleineren Motive aus dem Stamp Corner - Stempel Set - Meerverliebt und aus dem Stamp Corner - Stempel Set - Meerverliebt 2 verwendet. Koloriert habe ich die Motive wie immer mit meinen Copics, mit der Schere ausgeschnitten und mit Foam Dots aufgeklebt. Den Text findet Ihr ebenfalls im Stamp Corner - Stempel Set - Meerverliebt 2. Zum Schluss habe ich noch ein paar farblich passende Simple and Basic - Enamel Dots Aqua aufgeklebt und dann alles auf meine weiße Grundkarte geklebt.

So Ihr Lieben, wir hoffen Ihr nehmt wieder zahlreich an unserer Sketch Challenge teil.♥ 

Wir sind schon ganz gespannt auf Eure Werke.
 Nun wünsche ich Euch noch einen schönen Tag, Tschüssi und bis bald.

Sonntag, 14. Mai 2023

♥ DT Stamp Corner - Von Herzen alles Liebe zum Muttertag ♥

 Hallo Ihr Lieben,

ich wünsche Euch einen schönen Sonntag und allen Müttern einen schönen Muttertag, Meine heutige Karte vom Stamp Corner Blog habe ich für meine Mama gewerkelt und sie bekommt diese Karte,Blümchen und ein paar Pralinen heute von mir.

Für die Karte habe ich ein Stück Bristol Cardstock mit einer Stanze aus dem Wave Stanzen Set ausgestanzt. Darauf habe ich den Stamp Corner - Stempel Set - Heart mit dem Versamark Stempelkissen gestempelt und mit WoW Embossingpulver und einem Heat Tool heiß embosst. Anschließend habe ich den Hintergrund mit Distress Oxide Saltwater Taffy eingefärbt und auf ein ausgestanztes Stück Perfect Colouring Papier geklebt. Meine kleinere Grundkarte habe ich hinter das ausgestanzte Rechteck geklebt.


Den süßen Elefant aus dem Stamp Corner - Stempelset - Blumige Grüße habe ich mit folgenden Copics koloriert:

W0,W1,W2,W4 und R22,R21,R20. Anschließend habe ich ihn mit der Schere ausgeschnitten und mit Foam Dots auf den Hintergrund geklebt. Die Texte sind aus dem Stamp Corner - Stempel Set - Kleine Worte und aus dem Stamp Corner - Stempel Set - Kleine Worte 2.

Zum Schluss hat der Elefant noch einen Glitzerstein für seine Schleife bekommen.

Nun wünsche ich Euch noch einen schönen Sonntag / Muttertag,Tschüssi bis nächsten Sonntag.


Samstag, 13. Mai 2023

♥ DT Magengo - Don't worry be HOPPY ♥

 Hi everyone,

I wish you a happy Saturday and I'm really glad to see you here again on my blog.

 Today I show you another inspiration card with stamps, dies and stencil from Magengo Designs. For my card today I use the cute Be hoppy stamp set, the Sunny morning stencil, the Grass Border dies and the In-out stitched rectangles dies.

For this card I cut out a piece of Bristol cardstock with the In-out stitched rectangles dies an use Distress Oxide Fossilized Amber. Then I lay the Sunny Morning stencil over the rectangle and ink it with Dried Marigold and Picket Raspberry. 


Then I cut out another piece of Bristol cardstock with the Grass border die and ink it with Distress Oxide Mowed Lawn and glue it on the background. For the water I cut out another piece of Bristol cardstock and use Distress Oxide Salvaged Patina and glue it also on the background.

I stamp the images from the Be Hoppy stamp set and color them with my Copic Marker. I fussy cut them out with my scissors and glue them with Liquid glue and with Foam Tape on the card.

 
For the last step I glue my card base behind the background and stamp the sentiment on white cardstock and glue it also on the card.

Many thanks for stopping by and hope to see you soon here on my blog.

Mittwoch, 10. Mai 2023

♥ DT Christmas Craft Creations Challenge - No Stamping ♥

 Hi everyone,
 I wish you a happy Wednesday and I'm really glad to see you here again on my blog.
 
Today we start a new Challenge at the
 
 
For this month we have the topic

For my card I use some dies from Lawn Fawn.

 
I cut the Peppermint Stripes Backdrop with white cardstock and glue it on red cardstock. Then I cut it again with green cardstock and glue the small green stripes on the white backdrop. Then I distress a piece of green cardstock and glue it on my white card base. I glue the Peppermint Stripes Backdrop on the green cardstock. I cut out the Jolly Christmas Tree with Glimmer Cardstock and glue it on my card. For the sentiment I use the Line Border Happy Holidays and cut it with red and green cardstock and glue one above the other. For the last step I glue some golden stars on the card and I'm really happy how the card looks like. 
 
So now it's your turn to create a No Stamping card, can't  wait to see your creations. 
 
Many thanks for stopping by and I hope to see you here again on my blog. Have a great day.


Sonntag, 7. Mai 2023

♥ DT Stamp Corner - Hej mit Schmetterlingsbär ♥

Hallo Ihr Lieben,

ich wünsche Euch einen schönen Sonntag und freue mich sehr, dass Ihr heute wieder hier auf meinem Blog vorbei schaut.

Heute zeige ich Euch auf dem Stamp Corner Blog eine Karte mit dem süßen Schmetterlings Bär aus dem Stamp Corner - Stempel Set - Bärliset, welches in Zusammenarbeit mit Stuff-Deluxe entstanden ist. Für die Karte habe ich ein Stück Perfect Colouring Paper mit der Stamp Corner-Wave Stanze ausgestanzt  Anschließend habe ich mit der Wave Stanze und mit der My Favorite Things Die-Namics-Torn Paper Edges Stanze einen Streifen Masking Tape ausgestanzt und seitlich auf den ausgestanzten Hintergrund geklebt.

Den seitlichen Streifen habe ich dann mit Distress Oxide Tumbled Glass und Mowed Lawn eingefärbt und danach das Masking Papier wieder entfernt. Den Bär und die Blumen habe ich mit Copics koloriert, mit der Schere ausgeschnitten und mit Foam Dots aufgeklebt. Der Text ist ebenfalls in dem Stamp Corner - Stempel Set - Bärliset enthalten. Zum Schluss habe ich die Schmetterlinge und die Blumen noch mit kleinen Glitzersteinen dekoriert.

Nun wünsche ich Euch noch einen schönen Sonntag,Tschüssi und bis bald.


Donnerstag, 4. Mai 2023

♥ Lawn Fawn - Have a wheely great day ♥

 Hi everyone,

I wish you a happy Thursday and I'm really happy to see you here again on my blog.

Because I have so many leftover images from my card last Friday, I decided to create another Lawn Fawn card.

For this card I inked a piece of Bristol cardstock with Distress Oxide Fossilized Amber. Dried Marigold, Worn Lipstick and Seedles Preserves. For the grass border I use Distress Oxide Mowed Lawn. Then I cut it out with the Large stitched rectangle stackables dies and for the grass I use the Grassy Border die. 

Then I arrange the images on the background, glue them with Foam Dots and liquid glue on the background and I'm really happy how the card looks like.

Many thanks for stopping by and I hope to see you soon here on my blog. Have a great day.