Posts mit dem Label 2020 werden angezeigt. Alle Posts anzeigen

Sonntag, 6. Dezember 2020

♥ DT Stamp Corner - Frostige Grüße von den Funny Birds ♥

 Hallo Ihr Lieben,

ich wünsche Euch einen schönen zweiten Advent und hoffe, dass der Nikolaus bei Euch recht fleißig war.

Ich zeige Euch heute auf dem Blog von Stamp Corner eine neue Winterkarte mit dem süßen Funny Birds Stempel Set von Stamp Corner. Habt Ihr sie schon entdeckt, falls nicht, Ihr findet sie hier im Shop.

Als ich die beiden gesehen habe, wusste ich , dass sie perfekt für eine Winterkarte sind. Für die Karte habe ich ein Stück Cardstock mit Distress Oxide Tumbled Glass, Peacock Feathers und Faded Jeans eingefärbt. Anschließend habe ich ein Schneeflocken Stencil drüber gelegt. Damit das Stencil nicht verrutscht, habe ich es seitlich mit etwas Washi Tape festgeklebt. Dann habe ich das Stencil mit einer weißen Embossingpaste bestrichen und anschließend wieder vorsichtig entfernt. Die Winter Forest Stanze von Mama Elephant habe ich aus Perfect Colouring Paper ausgestanzt. Nachdem mein Hintergrund getrocknet war, habe ich das Winter Forest Cover auf den Hintergrund geklebt und anschließend auf meine weiße Grundkarte. Die Vögel habe ich mit Copics koloriert, mit der Schere ausgeschnitten und aufgeklebt. Den Schriftzug aus dem Stamp Corner Eisbärenset habe ich mit einer Stempelhilfe auf gestempelt. Zum Schluss habe ich noch ein paar weiße Perlen aufgeklebt.
 Ich sage Danke für Euren Besuch und wünsche ich Euch noch einen schönen kreativen Tag. Tschüssi und bis bald.

Materialliste:

Freitag, 4. Dezember 2020

♥ DT Magengo - Getting the Christmas Gift ♥

 Hi everyone,

I wish you a happy Friday and I'm really glad to see you here again on my blog.

Today I'm on the Magengo blog and show you my new card with the cute Getting The Christmas Gift digital stamp set.

You'll find the set here in the Magengo shop. 

For my card I use the trees, Santa, two critters and the gift bag from this set. I also use the mountains from the Christmas Coral set. For the sentiment i use a clear stamp from Lawn Fawn.

I create my scene on my PC in the Word program, I love to create little scenes with the digital stamps. They're so many different ways to use them and the most fantastic thing I love with digital stamps: You can change the size for every project, no matter what size you need. I printed out the scene with my laser printer on a Copic friendly paper, because I mostly use Copic Marker for coloring. Then I cut it out with a stitched rectangle die and color all images and the background with Copic Markers. If you are interested to know which Copics I use for my creations, please write it in the comment box below. After my coloring is done I glue my card panel on my white card base. 
Then I use a Wink of Stella Clear Brush Marker to add some sparkle on the mountains.
Because I really love glitter on my cards I also add some Stickles Star Dust on santas hat and on santas coat.
I hope you like this card and I inspire you a little bit to create also  an card with this set.
 Many thanks for stopping by and I'll hope to see you soon. Have a great day.

Freitag, 20. November 2020

♥ DT Magengo - Christmas Card / Santa's mailbox ♥

 Hi everyone,

I wish you a happy Friday and I'm really happy to see you here again on my blog.

Today I show you my new christmas card with digital stamps from Magengo November Release. For this card I use the Santa's Mailbox Set, which you can find here in the Magengo shop.

I start my card with create a scene on my PC and print out the images. I colored all images with Copic Markers and fussy cut them out with my scissors.


Then I cut out a card panel and use Distress Oxide Tumbled Glass and Peacock Feathers for ink blending. I also cut out a snow hill with a Lawn Fawn die and glue it on my card panel. I glue the tree and the lanterns with liquid glue on the card panel and then all on my white card base. For the little critters and the mailbox I use Foam Dots for more dimensions on the card. I add some red stickles on the mail box and Stickles Star Dust on the santa hat from the cute little dog. For the final step I add many white dots with a gel pen.

I'll hope I inspire you to create a card with the Santas Mailbox stamp set.
 Many thanks for stopping by and I'll hope to see you soon.
 

Mittwoch, 11. November 2020

♥ DT Magengo - Christmas card / Santa is coming to town ♥

 Hi everyone,

I wish you a happy Wednesday and I'm really glad to see you here again on my blog.

Today I'm on the Magengo Design blog and show you a christmas card with the cute digital stamp set Santa is coming to town.

You'll find the set here in the shop.

 For my card I start as always with print out the images and color them with my Copic Markers. I cut out a card panel with the flying santa on the top. I inked the panel with Distress Oxide Faded Jeans and Stormy Sky.

Then I cut out some snow hills and some mountains, inked them with Distress Oxide Tumbled Glass and glue them on the card panel. I also cut out a white frame and glue them on the background panel and my card base behind the background. I fussy cut out the images with my scissors and glue them on the card. For some glimmer I add some Stickles Star Dust on the snow hills and on the rooftops, On the mountains I glue some shimmer cardstock. For the final touch I cut out some lttle golden stars and I'm really happy how the card looks like.
Many thanks for stopping by and I'll hope to see you soon. Have a wonderful day.

Donnerstag, 5. November 2020

♥ DT Stempelgarten - Sterne Challenge ♥

 Hallo Ihr Lieben,

ich wünsche Euch einen schönen Donnerstag und freue mich sehr, dass Ihr auch heute wieder auf meinem Blog vorbei schaut.

Heute starten wir wieder eine neue Challenge auf dem Blog der

Stempelgarten Challenge

Diesmal haben wir folgendes Thema für Euch:

Sterne

Natürlich gibt es auch diesmal wieder ein tolles Bastelpaket im Wert von über CHF 20.00 gewinnen.


Ich habe mich bei meiner Karte für die Stempel von Lawn Fawn entschieden.

Die Sterne aus dem Winter Skies Set habe ich mit goldenem Embossingpulver heiß embosst. Anschließend habe ich den Hintergrund mit Diestress Oxide, Salty Ocean, Faded Jeans und Chipped Sapphire eingefärbt und goldene Farbspritzer aufgetragen. Nach dem trocknen habe ich den Hintergrund und zusätzlich noch einen kleinen Hügel mit einer Lawn Fawn Stanze ausgestanzt. Den Rand habe ich dann noch einmal aus weißem Cardstock ausgestanzt und alles auf meine Grundkarte geklebt. Die Motive habe ich mit Copics coloriert, ausgeschnippelt und mit Foam Tape auf die Karte geklebt. Zum Schluss habe ich den Text mit dem Misti Tool direkt aufgestempelt.

So Ihr Lieben, nun seid Ihr wieder an der Reihe. zeigt uns Eure tollen Sternen Werke, wir sind schon ganz gespannt auf Eure kreativen Umsetzungen. 

Nun sage ich Danke für Euren Besuch und wünsche ich Euch noch einen schönen kreativen Tag. Tschüssi und bis bald.

Mittwoch, 4. November 2020

♥ DT Stamp Corner - Frostige Grüße ♥

 Hallo Ihr Lieben,

ich wünsche Euch einen schönen Mittwoch und freue mich sehr, dass Ihr heute wieder hier auf meinem Blog vorbei schaut.

Heute zeige ich Euch auf dem Blog von Stamp Corner eine Karte mit dem neuen süßen Stamp Corner Eisbären Set. Da ich dieses Set so süß finde, musste ich es gleich als erstes aus dem neuen Release verwenden. Die Stempel findest Du hier im Shop.

Den Hintergrund der Karte habe ich mit Distress Oxide Salty Ocean und Chipped Sapphire eingefärbt. Anschließend habe ich das Lawn Fawn Snowy Sky Stencil drüber gelegt und mit weißer Embossingpaste eingestrichen und trocknen lassen. In der Zwischenzeit habe ich ein Stück Perfect Colouring Paper mit d er Lawn Fawn Stitched Hillside Backdrop Landscape Stanze ausgestanzt. Die Berge sind mit der Lawn Fawn Stanze Over the Mountain aus hellgrauem Cardstock und irisierendem Glitzer Cardstock ausgestanzt und auf den getrockneten Hintergrund geklebt. Nachdem ich dann die Backdrop Stanze auf den Hintergrund geklebt hatte, fiel mir ein, dass ja die Lawn Fawn Forest Border Stanze auch noch ganz gut passen würde. Ich habe dann die kleinen Bäumchen einfach einzeln leicht unter den Rand geklebt. Den Text aus dem Eisbären Set habe ich mit einer Stempelhilfe direkt auf die Karte gestempelt. Gemattet habe ich den Hintergrund mit farblich passendem Cardstock und dann auf meine weiße Grundkarte geklebt. Die süßen Eisbären habe ich mit Copics coloriert, ausgeschnitten und mit Foam Tape aufgeklebt. Zum Schluss habe ich noch etwas Glitzer auf die Eisscholle mit dem Wink of Stella Brush Clear aufgetragen.

Nun sage ich Danke für Euren Besuch und wünsche Euch noch einen schönen Tag. Passt gut auf Euch auf, bleibt gesund und Tschüssi bis bald.

Materialliste:

Sonntag, 1. November 2020

♥ DT Sparkles Christmas Challenge - Challenge #118 Gold or Silver and /or Glitter ♥

 Hi everybody,

I wish you a happy Sunday and I'm really glad to see you here again on my blog.

Today we start a new challenge at the

Sparkles Christmas Challenge

For this challenge we have this topic

 Gold or Silver and /or Glitter 

  For my card I use the Stacked Merry Die-namics from My Favorite Things and a little gnome from Sugar Pea Designs.
I added a bit of Distress Oxide Abandoned Coral on a cardstock panel and cut it out with the My Favorite Things Stitched Rectangle Scallop Frames Die-namics. I cut out the Merry with golden Glitter cardstock and glue it on the background. Then I emboss the word Christmas with Lawn Fawn white embossing powder on black cardstock and glue it next to the cutting Merry. I color the little gnome with Copics, cut it out with a scissors and glue it with Foam tape on top of the black cardstock. Then I glue my background on my whiite cardstock. For the final step I glue some little golden stars on my card.
 
So now it's your turn, I'll hope you join out new challenge. we can't wait to see your creations.
Many thanks for stopping by and I hope to see you soon here on my blog. Have a great day.


Montag, 26. Oktober 2020

♥ DT Magengo - Joy To The World Slimline Card ♥

  Hi everyone,

I wish you a happy Monday and I'm really glad to see you here again on my blog.

Today I'm on the Magengo blog and show you my new slimline card with the cute Christmas Band Digital stamp set.

I started my card with printing out the images and color them with my Alcohol Markers. I fussy cut them out with my scissors, because until now I don't have a plotter to cut them out. But perhaps I'll be on Santa's Nice list and he'll bring me a plotter at christmas.

Then I cut out a card panel with a Slimline die from Lawn Fawn and inked it with Distress Oxide Tumbled Glass and Peacock Feathers. I also cut out a snow hill from Lawn Fawn and a cityscape from Mama Elephant with a slimline die.
I glue the cityscape and the snowhill on the background and then on my white card base. I arrange the images on the background and glue them with Foam Tape and liquid glue on the card. I stamp the little notes and the sentiment on the top of the card. For the final touch I add tiny little white dots all over the card, so it does looks like the cute band sings in a snow flurry.

I had so much fun to create this card and I'll hope I inspire you to create your own christmas band. Many thanks for stopping by and I'll hope to see you soon. Have a wonderful day.

Sonntag, 25. Oktober 2020

♥ DT Stamp Corner - Merry Christmas Karte mit Stencil Hintergrund ♥

 Hallo Ihr Lieben,

ich wünsche Euch einen schönen Sonntag und freue mich sehr, dass Ihr heute wieder hir auf meinem Blog vorbei schaut.

Heute zeige ich Euch auf dem Stamp Corner Blog eine Weihnachtskarte mit einem der neuen Stamp Corner Stencil, habt Ihr sie schon im Shop entdeckt? Ich bin total begeistert von der Qualität und liebe sie jetzt schon.

 
Für meine Karte habe ich das Geometric 3 Stencil verwendet und den Hintergrund mit Distress Oxide Shabby Shutters eingefärbt. Anchließend habe ich den Hintergrund mit der Lawn Fawn - Stitched Scalloped Rectangle Frames Stanze ausgestanzt und auf meine etwas kleinere Grundkarte geklebt. Das Wort MERRY habe ich mit der My Favorite Things Die-namcs Stacked Merry aus Spiegelkarton ausgestanzt und auf den Stencil Hintergrund geklebt. Das Motiv aus dem My Favorite Things Christmas Cheer Set habe ich mit Copics coloriert, ausgeschnitten und mit Foam Dots aufgeklebt. Das Wort Christmas habe ich auf schwarzem Cardstock mit weißem Embossingpulver heiß embosst und mit dem Tombow Multi Talent Liquid Glue aufgeklebt. Zum Schluss habe ich noch ein paar Sequins aus meinem Bestand aufgeklebt. 
Ich hoffe Euch gefällt meine Karte und ich konnte Euch etwas inspirieren.
Nun wünsche ich Euch noch einen schönen Tag, lasst es gut gehen und passt gut auf Euch auf.
Tschüssi bis bald.

Materialliste:

Dienstag, 6. Oktober 2020

♥ DT Magengo - Slimline Card with I love you furry much digital stamps ♥

Hi everyone,

I wish you a happy Tuesday and I'm really glad to see you here again on my blog.♥ 

Today I'm on the Magengo blog and show you  a new slimeline card with a cute digital fall stamp set from the October release.

 After I saw the cute images from the I love you furry much digital stamp set I knew these are so perfect for a slimline card and so I decided to create a card with these cute foxes.

I start my card with cutting out the slimline background and inked it with Distress Oxide Dried Marigold, Picket Raspberry and Aged Mahagony. I put the panel aside and cut out a grass hill with a slimline border. Then I inked the hill with Distress Oxide Peeled Paint and Shabby Shutter. I cut out some trees with a tree border die and use my Zig Zag Clean Color Real Brush Marker for coloring the trees. I glue them behind the grass hill and then all on my background and on my white card base.
I printed out the cute images from the I love furry much digital stamp set  and colored them with my Copic Markers.
After coloring all images I fussy cut them out with my scissors and glue this fox with Foam tape in front of the mushrooms and glue one mushroom with some leaves besides.
For the fox with the hedgehogs I create a pile of leaves on my PC and glue the fox with Foam tape in front of it. The cute little fox would really love to jump in the pile of leaves. I stamp the sentiment with my Misti Tool directly on top of the card. Then I decided to print out also two birds which are also included in the stamp set and glue them also on the top of the card.

 I hope I inspired you a bit with my slimline card. You'll find the I love you furry much digital stamps here in the Magengo shop.
Many thanks for stopping by and hope to see you soon. Have a wonderful day.

Montag, 28. September 2020

♥ DT Magengo - Time to read / You are so special to me ♥

 Hi everyone,

I wish you a happy Monday and I'm really glad to see you here again on my blog.

Today I'm on the Magengo blog and show you a new card and a tag with the cute Read more Digital stamps.

I must admit, that these stamps reminds me on my childhood, when my mother read to me every evening my favorite books. This was the best time of the day and I really love this time.

I start my card and the tag with creating a background with Distress Oxide Wild Honey and Aged Mahagony. Then I add some golden splahes on the background and let it dry.

I printed the images out with my laser printer and colored them with my Copic Marker. I fussy cut them out with my scissors and glue them on my backgrounds. For the cute bears I use Foam tape for a bit more dimension. I stamp the sentiment directly on the card and on the carpet some little flowers.  

I really love this cute scene and I hope you like it also. You'll find the Read More stamp set here in the shop.

Many thanks for stopping by and hope to see you soon here on my blog. Have a wonderful day.


Samstag, 19. September 2020

♥ DT Magengo - Hi there ! ♥

 Hi everyone, 

I wish you a happy Saturday and I'm really glad to see you here again on my blog.

Today I'm here with my new Design Team card for Magengo.

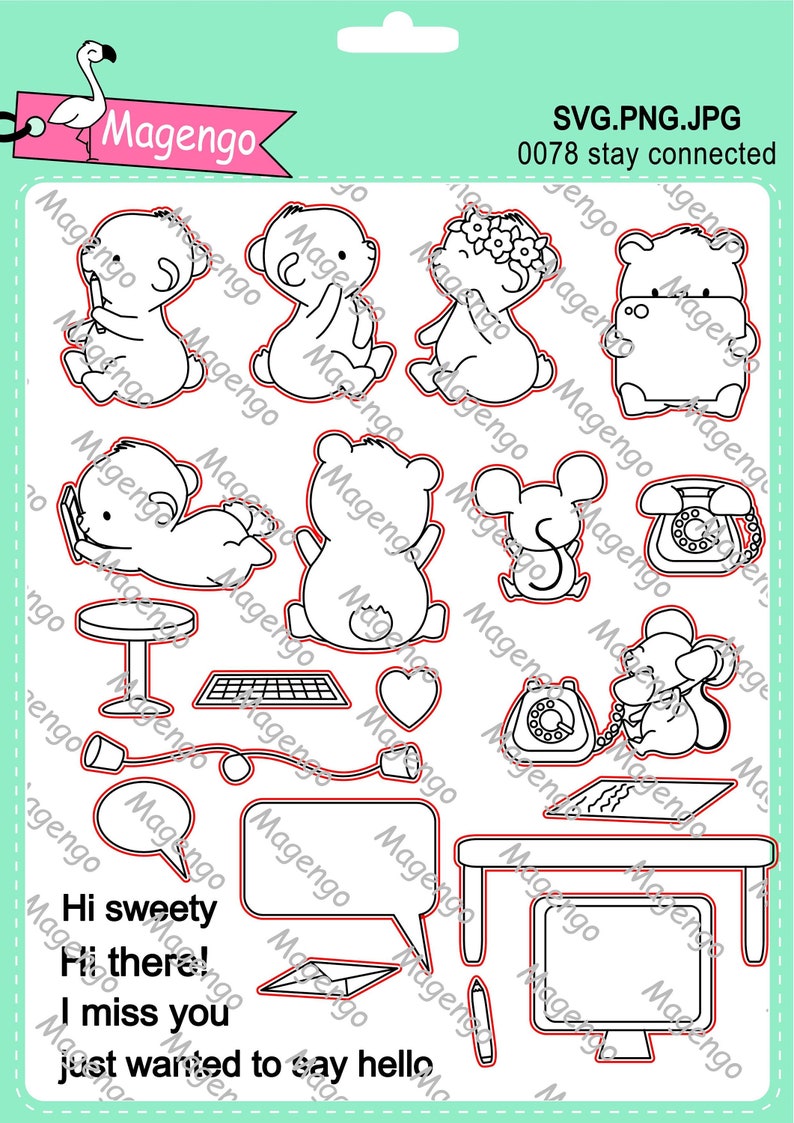
I show you a new card with the cute Stay Connected Digital stamps from the September 2020 release.

I start my card with creating the background. I cut out a panel with a rectangle die and ink the bottom with Distress Ink Tea Dye. Then I stamp the wooden floor on the bottom and use a pencil for the skirting board. I inked the rest of the panel with Distress Ink Milled Lavender. I use a stencil and Distress Ink Victorian Velvet for the wallpaper pattern. I put my background aside for drying.

In the meantime I printed out the images, color them with Copic Markers and fussy cut the images out with my scissors. I glue the images with liquid glue and Foam tape on my background and then on a white card base.

I really love this cute scene and hope you like it also. You'll find the stamps here in the Magengo Shop.

Bleiben Sie verbunden digitale Stempel-Set Svg-Dateien image 0

Many thanks for stopping by and I hope to see you soon here on my blog. Have a great day.

Freitag, 11. September 2020

♥ DT Stamp Corner - Pinguin Slimline Karte ♥

Hallo Ihr Lieben,

ich wünsche Euch einen schönen Freitag und freue mich sehr, dass Ihr heute wieder hier auf meinem Blog vorbei schaut. 

Heute zeige ich Euch auf dem Blog von Stamp Corner eine Slimline Karte mit den süßen Stempeln aus dem Stamp Corner Pinguin Set.


Ich liebe ja die Slimline Marquee Stanze von Whimsy Stamps und wollte unbedingt die süßen Stamp Corner Pinguine noch einmal verwenden. Für den Hintergrund habe ich auf einem Stück Perfect Colouring Paper das mittlere Fenster markiert und in diesem Fenster die Schneeflocken aus dem Set mit VersaMark Ink gestempelt und mit weißem Embossingpulver heiß embosst. Anschließend habe ich den Hintergrund mit Distress Oxide Faded Jeans und den Rand nochmal mit Chipped Sapphire eingefärbt und auf meine weiße Grundkarte geklebt. Die Pinguine habe ich mit Copics coloriert, ausgeschnitten und mit Foam Tape in die Öffnungen geklebt. Den Text habe ich mit VersaMark auf schwarzen Cardstock gestempelt und ebenfalls mit weißem Embossingpulver heiß embosst. Damit er in das mittlere Fenster passt, habe ich den Text einfach geteilt und schräg abgeschnitten. Zum Schluß habe ich noch ein paar  Nuvo Drops Ivory Seashell und zwei größere Perlen aufgeklebt.

Nun sage ich Danke für Euren Besuch und wünsche ich Euch noch ein kreatives Wochenende. Tschüssi und bis bald.

Materialliste:

Montag, 7. September 2020

♥ DT AAA Birthday Challenge - Animals & Critters ♥

 Hi everybody,
I wish you a happy Monday and I'm really happy to see you here again on my blog.

Today we start a new challenge at the

AAA Birthday Challenge

For this challenge we want to see Animals or Critters on your card, but remember it must be a birthday card. You can take part of this challenge until the 4th.October and we can't wait to see your creations.

For my card I use the cute stamps from Heffy Doodle.

I create a Distress Oxide background with Dried Marigold and Carved Pumpkin and cut it out with a rectangle die from Heffy Doodle. Then I cut out a little sand hill with a die from Lawn Fawn Slimline Stitched Hillside Borders. I inked the hill with Tea Dye and Antique Linen. For the waves I use Salty Ocean and Mermaid Lagoon and cut them out. Then I cut all out with the rectangle die from Heffy Doodle, so it fits perfectly to my background.  I color the images with my Copics and fussy cut them out with a scissors and glue them on my card. For some images I use Foam Tape for a bit more dimension. I stamp the sentiment with my Misti Tool directly on the card and I'm really happy how the card looks like.

Now it's your turn to join our new challenge, hope to see your creation there.
So that's it for today. Many thanks for stopping by and I hope to see you soon here on my blog. Have a great day.

Sonntag, 6. September 2020

♥ DT Stamp Corner - Pinguin Spaß ♥


Hallo Ihr Lieben,

ich wünsche Euch einen schönen Sonntag und freue mich sehr, dass Ihr heute wieder hier auf meinem Blog vorbei schaut.

Heute zeige ich Euch auf dem Blog von Stamp Corner meine erste Karte mit dem neuen Pinguin Stempel Set. Habt Ihr sie schon im Shop entdeckt? Ich finde die kleinen Kerlchen ja zu knuffig.


Für den Hintergrund habe ich ein Stück Perfect Colouring Paper mit den Schneeflocken aus dem Pinguin Set mit VersaMark Ink bestempelt und mit weißem Embossingpulver heiß embosst. Nach dem der Hintergrund abgekühlt war, habe ich ihn mit Distress Oxide Chipped Sapphire und Faded Jeans eingefärbt und mit einer rechteckigen Stanze aus meinem Bestand ausgestanzt. Für den Eishügel habe ich ein Stück Perfect Colouring Paper mit Distress Oxide Tumbled Glass eingefärbt und mit einer Stanze aus dem Lawn Fawn Stitched Hillside Borders Set ausgestanzt. Für den weißen Rahmen habe ich die My Favorite Things Stitched Scallop Rectangle Framed Die-namics verwendet. Die Motive habe ich mit Copics coloriert und mit der Schere ausgeschnitten. Den Pinguin auf der Eisscholle habe ich mit 1mm Foam Dots aufgeklebt, für die anderen Motive habe ich den Tombow Multi Talen Liquid Glue verwendet. Auf die Tannenbäume habe ich noch bronze farbene Glitzersteine aufgeklebt. Den Text habe ich mit einer Stempelhilfe direkt auf die Karte gestempelt.

Nun sage ich Danke für Euren Besuch und wünsche ich Euch noch einen schönen kreatives Wochenende. Tschüssi und bis bald.

Materialliste:

Samstag, 5. September 2020

♥ DT Stempelgarten - Challenge 96 - Im Wald ♥

 Hallo Ihr Lieben,

ich wünche Euch einen schönen Samstag und freue mich sehr, dass Ihr heute wieder hier auf meinem Blog vorbei schaut.

Heute ist es wieder soweit und wir starten eine neue Challenge auf dem Blog der

Stempelgarten Challenge

Unser Thema im September lautet 

Im Wald

Perfekt für die ersten Herbstkarten, oder?

Natürlich könnt Ihr auch diesmal wieder ein ein tolles Bastelpaket im Wert von über CHF 20.00 gewinnen. 


Für meine Karte habe ich mich für das süße Eichhörnchen von Gerda Steiner Designs entschieden.

Den Hintergrund habe ich mit Distress Oxide Shabby Shutters, Dried Marigold und Carved Pumpkin eingefärbt. Die schmalen Bäume habe ich mit der Winter Forest Cover Stanze von Mama Elephant ausgestanzt und mit Distress Ink Antique Linen eingefärbt. Für die Grundkarte habe ich die My Favorite Things Stitched Rectangle Scallop Frames Die-namics und die Double Stitched Circle Stax Die-namics verwendet. Die Motive habe ich mit Copics coloriert und zum Teil mit Foam Dots aufgeklebt. Den Text habe ich wieder mit dem Misti Tool direkt auf die Karte gestempelt. Zum Schluss habe ich noch ein paar Sequins aufgeklebt.
 
So nun seid Ihr wieder an der Reihe. Zeigt uns Eure kreativen Werke, wir sind schon ganz gespannt auf Eure Umsetzungen. 

Nun sage ich Danke für Euren Besuch und wünsche ich Euch noch einen schönen kreatives Wochenende. Tschüssi und bis bald.