Freitag, 29. Januar 2021

♥ DT Stamp Corner - Milkshake Karte mit Stencil Hintergrund ♥

 Hallo Ihr Lieben,

ich wünsche Euch einen schönen Freitag und freue mich sehr, dass Ihr heute wieder hier auf einem Blog vorbei schaut.

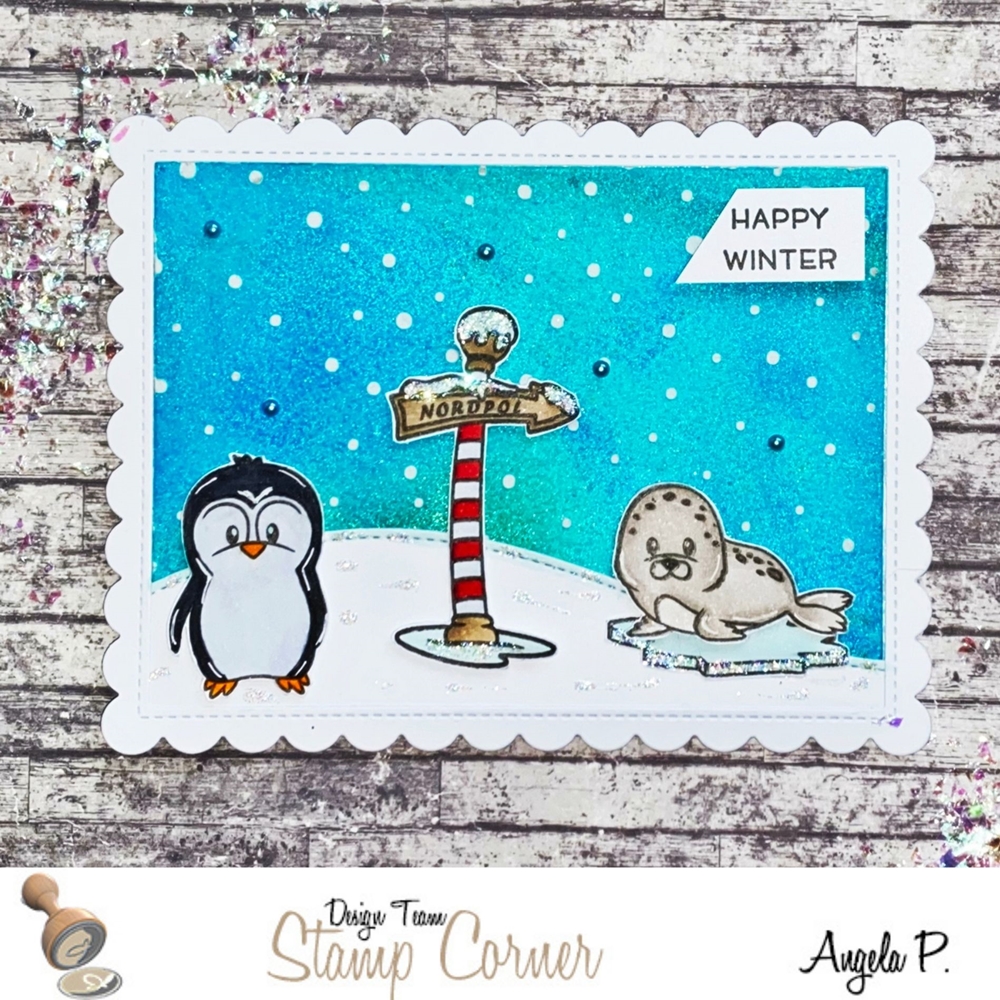
Heute zeige ich Euch auf dem Blog von Stamp Corner eine Karte mit dem neuen Mama Elephant Milkshake Stempel Set und einem Hintergrund mit dem Kreis Stencil von Stamp Corner.

Für den Hintergrund habe ich das Geometric 3 Stencil von Stamp Corner verwendet und mit Distress Oxide Peacock Feathers und Tumbled Glass eingefärbt. Nach dem trocknen habe ich den Hintergrund mit der größten Stanze aus dem Zig Zag Retangle Die Set von Whimsy Stamps ausgestanzt. Da mir der passende Cardstock fehlte, habe ich einfach den Rand von einem Stück Perfect Colouring Paper mit einem farblich passenden Copic koloriert und abschließend auf meine weiße Grundkarte geklebt. Darauf habe ich dann mit Tombow Multi Talent Liquid Glue den Stencil Hintergrund geklebt.

Die Motive habe ich mit Copics koloriert, mit der Schere ausgeschnippelt und mit Foam Pads aufgeklebt. Für den Text habe ich eine Stempelhilfe verwendet. Zum Schluss habe ich noch ein paar Clear Drops aus meinem Bestand verwendet.

Ich wünsche Euch noch einen kreativen Tag, Tschüssi und bis bald.


Materialliste:


Mittwoch, 27. Januar 2021

♥ Mama Elephant - Sending warm wishes ♥

 Hi everybody,

I wish you a happy Wednesday and I'm really glad to see you here again on my blog.

Today I show you a new card with the cute Toasty Friends and Let it Snow stamps from Mama Elephant.

I start my card with creating the background, therefore I cut out a piece of cardstock with a scalloped die from Lawn and Fawn. Then I stamp the trees from the Let it Snow set several times on the middle rectangle and color the trees with Copic Markers.

For the clouds I use the Puffy Cloud Border from Lawn Fawn and glue it on the top of the tree background. For the snow hill I use a die from the Slimline Stitched Hillside Borders from Lawn Fawn and add a bit of Stickles Star Dust on the edge of the snow hill. After it is dry I glue the rectangle with the scalloped frame together on my small white card base. I color the cute critters from the Toasty Friends set with Copic Markers and fussy cut them out with a scissors. I glue them with Foam Tape on the background. For the sentiment I use a stamp from Hero Arts and stamped it with my Misti tool directly on the clouds. For the final step I add some more Stickles Star Dust on the background and I'm really happy how the card look like.
 
 Many thanks for stopping by and I hope to see you soon here on my blog. Have a great day.♥ 


Freitag, 22. Januar 2021

♥ DT Magengo - You Are A Superstar ♥

 Hi everyone,

I wish you a happy Friday and I'm really glad to see you here again on my blog.

Today I'm on the Magengo Blog and show you another card  with the cute Ballet Stage digital stamps from the new release.

 For this card I had the idea to create and little cheerleader scene and I'm really happy how the card looks like.


I start this card with creating all the images in Word. I use the Ballet Stage digital stamps and also use the files from the Ballet Stage and create the stage curtain. I printed out the images on a Copic friendly paper and colored them with my Copic Markers. Then I cut them out with a scissors. For the background I inked a piece of cardstock with Distress Oxide Tumbled Glass. For the ground I use Distress Ink Antique Linen and draw some texture with a pencil on the ground I glue the curtain with Foam Tape on the background and use my Misti Toll to stamp the sentiment from Lawn Fawn.  Then I glue the three "cheerleader" dancer with Foam Tape on my car. For the final step I add some pink Gemstones on the curtain.

I use these items from the Magengo shop for my card:

Ballet Stage Digital Stamps

Ballet Stage Files

 I hope I could inspire you a with my card. Many thanks for stopping by and hope to see you soon. Have a great day.


Montag, 18. Januar 2021

♥ DT Magengo - Love You slimline Card with Ballet Stage Digital Stamps ♥

 Hi everyone,

I wish you a happy Monday and I'm really glad to see you here again on my blog.

Today I'm on the Magengo Blog with another cute card from the new Magengo release. For this slimline card I use the cute Ballet Stage digital stamps. You'll find the digis here in the Magengo Etsy Shop.

For my new card I decided to create another slimeline card with a Distress Oxide background.

I start my card with creating the background. I inked a panel of Bristol Smooth cardstock with Distress Oxide Seedles Preserves and Abandoned Coral and let it dry. Meanwhile I cut out the white panel with a die from Whimsy stamps and glue it on my dry background and then all on my white card base. 

I color the images with my Copic Markers and fussy cut them out with a scissors and glue them with Foam Tape on my card.

For the final touch I cut out some tiny hearts in the same colour I used for the background. I glue them on the white panel and I'm really happy how it looks like.

Many thanks for stopping by and hope to see you soon. Have a great day.

Freitag, 15. Januar 2021

♥ DT Stamp Corner - Shaker Tags mit arktischen Tieren ♥

Hallo Ihr Lieben,

ich wünsche Euch einen schönen Freitag und freue mich sehr, dass Ihr heute wieder hier auf meinem Blog vorbei schaut.

Heute zeige ich Euch  auf dem Blog von Stamp Corner mal wieder zwei Shaker Tags und mit den Stamp Corner ArktischeTiere Stempel. Da es hier letztens etwas geschneit hat, passen die Winter Tags natürlich perfekt.

Für die Grundform der Tags habe ich die My Favorite Things Stitched Traditional Tag Stax Stanze verwendet.

Die Tags habe ich dann mit Distress Oxides Faded Jeans, Chipped Sapphire und Tumbled Glass eingefärbt.  Für die Schneehügel habe ich Glitzerkarton aus meinem Bestand verwendet. Die quadratische und runde Form habe ich dann mit den Double Stitched Circle Stax und Double Stitched Square Stax Stanzen ausgestanzt und mit einem Stück Folie hinterklebt. Um genügend Abstand ziwschen den zwei Lagen zu haben, verwende ich immer Foam Tape. Für die "Füllung" nehme ich am liebsten Pailletten, da diese sich so schön hin und her bewegen. Die Motive habe ich mit Memento Ink Tuxedo Black auf das Perfect Colouring Paper gestempelt und mit Copics koloriert. Zum aufkleben habe ich Klebeband verwendet. Den Text aus dem Frosty Fairy Friend Set von Lawn Fawn habe ich auf einen schmalen Streifen Cardstock gestempelt und etwas abgeschrägt. Zum Schluss habe ich noch ein paar weiße Perlen und Pailletten aufgeklebt.

Ich hoffe ich konnte Euch etwas inspirieren und wünsche Euch noch einen schönen Tag. Passt gut auf Euch auf, Tschüssi bis bald.

Materialliste:

Mittwoch, 13. Januar 2021

♥ ATC Tausch November / ATC Verrückte / Thema Mäuse ♥

 Hallo Ihr Lieben,

ich wünsche Euch einen schönen Mittwoch und freue mich sehr, dass Ihr heute wieder hier auf meinem Blog vorbei schaut.

Heute zeige ich Euch wieder ein paar ATC's, die ich für ein Tausch mit den Mädels aus der FB Gruppe #ATC Verrückte gewerkelt habe.


Das Thema im November war 
MÄUSE
 
Ich habe für meine ATC's Stempel von Clearly Besotted, Craftin Desert Divas und Hello Bluebird verwendet.

Für die Hintergründe habe ich Distress Oxides verwendet. Die Motive habe ich mit Copics und Tri Blend Marker coloriert, ausgeschnitten und aufgeklebt. Die Texte habe ich mit dem Misti Tool direkt aufgestempelt.

Nun sage ich Danke für Euren Besuch und wünsche Euch noch einen schönen Tag. Passt gut auf Euch auf, bleibt gesund und Tschüssi bis bald.

Dienstag, 12. Januar 2021

♥ DT Magengo - Big Hug Card with Robots Love Digital stamps ♥

 Hi everyone,

I wish you a happy Tuesday and I'm really happy to see you here again on my blog.

Today I show you on the Magengo blog my first card with the cute Robots Love digital stamp set from the new release.

You'll find these cuties here in the Magengo shop. For my card I decided to create a background with all the tiny images and  a larger image in the foreground.

I start my card with creating the background, I create it with Windows Word. I use the accessoires stamps and reduce the images that they fits perfectly to cut out with a rectangle die.

Then I color all small images wth my Copic marker and cut it out with a scalloped rectangle die. Because I don't have the right colour of cardstsock, I create my own. I color all edges from a piece of Marker friendly cardstock with the Copic colour that I've used in the background, so that it fits perfectly. I glue my background with liquid glue on the coloured cardstock and then on my white card base. Then I colored the robot also with Copics and cut it out with a smaller rectangle die. For more dimension on my card I glue the smaller rectangle with Foam Tape in the middle of the card. For the final step I glue some pearls on my card. If you don't have the right colour for your pearls, you can color them also with your Copic Markers, that works perfectly. 
 
I'll hope I'll can you inspire a little bit with my card. Many thanks for stopping by and hope to see you soon.Have a great day.

Samstag, 9. Januar 2021

♥ DT Stempelgarten - CH #100 / Spass im Schnee ♥

 Hallo Ihr Lieben,

ich wünsche Euch einen schönen Samstag und freue mich sehr, dass Ihr wieder hier auf meinem Blog vorbei schaut.

Seit letztem Dienstag gibt es eine neue Challenge auf dem

Stempelgarten Challenge Blog


Diesmal haben wird diese Thema für Euch

Spass im Schnee


Natürlich gibt es auch diesmal wieder ein tolles Bastelpaket im Wert von über CHF 20.00 gewinnen.


Für meine Slimline Karte habe ich das Snow Buddies Set von My Favorite Things verwendet.

Den Hintergrund habe ich mit Distress Inks Chipped Sapphire und Faded Jeans gestaltet und anschließend mit der Slimline Stanze von Lawn Fawn ausgestanzt. Für den Schneehügel habe ich eine Stanze aus dem Lawn Fawn Stitched Hillside Border Set verwendet. Die Motive habe ich mit Copics koloriert und mit Foam Tape aufgeklebt. Die Schneeflocken und den Text habe ich mit weißem Embossingpulver heiß embosst. Zum Schluss habe ich noch ein paar Perlen aufgeklebt.

So Ihr Lieben, nun seid Ihr wieder an der Reihe. Zeigt uns Eure Werke bis zum 31.01.2021, wir sind schon ganz gespannt auf Eure kreativen Umsetzungen. 

Nun sage ich Danke für Euren Besuch und wünsche ich Euch noch einen schönen kreativen Tag. Tschüssi und bis bald.

Freitag, 8. Januar 2021

♥ DT Stamp Corner - Happy Winter Karte ♥

Hallo Ihr Lieben,

ich wünsche Euch einen schönen Freitag und freue mich sehr, dass Ihr heute wieder hier auf meinem Blog vorbei schaut.

Heute zeige ich Euch auf dem Blog von Stamp Corner eine Karte mit dem neuen Stamp Corner Arktische Tiere Stempel Set. Habt Ihr die neuen Sets im Shop schon entdeckt? Wenn nicht, schaut doch unbedingt mal hier vorbei.

Für meine Karte habe ich einen Hintergrund mit den Nuvo Shimmer Powder Blue Blitz und Atlantis Burst eingefärbt, ich liebe ja diese Shimmer Powder, da die Ergebnisse immer unterschiedlich sind. Ich hoffe Ihr könnt den Schimmer hier auf dem Foto etwas erkennen.

Nachdem trocknen habe ich den Hintergrund mit der Lawn Fawn Stitched Scalloped Rectangle Frames Die ausgestanzt. Auf den eingefärbten Hintergrund habe ich dann mit dem Snowy Sky Stencil von Lawn Fawn und weißer Embossingpaste noch ein paar Schneeflocken aufgetragen. Für meine Karte habe ich aber nur den mittleren Teil verwendet, da ich unbedingt einen weißen Rahmen und einen Schneehügel für die Karte verwenden wollte 

Den Schneehügel habe ich mit einer Stanze aus dem Stitched Hillside Border Set von Lawn Fawn ausgestanzt und auf den Hintergrund geklebt und anschließend den weißen Rahmen drüber geklebt. Die Grundkarte habe ich wieder etwas kleiner als den Rahmen zugeschnitten und dahinter geklebt. Die Motive habe ich mit Copics koloriert, mit der Schere ausgeschnitten und mit Tombow Multi Talent Liquid Glue und Foam Dots aufgeklebt. Für den Text habe ich Stempel aus dem Lawn Fawn Frosty Fairy Friends verwendet. Zum Schluss habe ich noch ein paar Perlen aus meinem Bestand aufgeklebt.

Nun sage ich Danke für Euren Besuch und wünsche Euch noch einen schönen Tag. Lasst es Euch gut gehen. Tschüssi bis bald.
 

Materialliste:

Montag, 4. Januar 2021

♥ DT AAA Birthday Challenge - Game 21 #Stencil Background ♥

 Hi everyone,

I wish you a happy Monday and I'm really glad to see you here again on my blog.

Today we start a new challenge at the

AAA Birthday Challenge

For this challenge we have the topic

Stencil Background

You can take part of our challenge until the 31th. January. We can't wait to see your creations.

For my card I use a stencil from Studio Katia and the image is from Newtons Nook Designs.

I start my card with creating the background. I inked a piece of Bristol Smooth Cardstock with Distress Oxide Tumbled Glass. Then I place the stencil over the background and inked it with Distress Oxide Peacock Feathers. I also add some golden watercolor splashes on the background. After it is dry I cut it out with the Crazy Stitched Frame Die and glue it on a piece of golden glitter cardstock and then on my white card base. I colored the images from Newtons Nook Designs with my Copic Markers and fussy cut it out with my scissors. I glue it with Foam Dots on my card. For the sentiment I use a banner and glue it under the image. For the final touch I glue some clear drops from Studio Katia on the card.

So I hope you'll join our new challenge, but remember it must be a birthday card.

Many thanks for stopping by and I hope to see you soon here on my blog. Have a great day.

Freitag, 1. Januar 2021

♥ DT Sparkles Christmas Challenge - CH #120 Holiday / Christmas Treats ♥

 Hi everybody,

I'm here again with my second posting for today.

 Today we start our first christmas challenge in 2021 at the

Sparkles Christmas Challenge

For this challenge we have the topic

Holiday/Christmas Treats

We can't wait to see your creations.

For my card I use the Sweet Christmas Stamps from Lawn Fawn.

I start my card with creating a Distress Oxide background with Spun Sugar and Picked Raspberry. Then I cut out the Lawn Fawn Stitched Hillside Backdrop Landscape and glue it on the background and then all on my white card base. I colored all images with my Copic Markers and fussy cut them out with my scissors. I glue the images with liquid glue and some with Foam Dots on my card. I stamp the sentiment which is also in the Sweet Christmas set with my Misti Tool directly on my card.
 
So now it's your turn, I'll hope you join our new challenge. We can't wait to see your creations.
Many thanks for stopping by and I hope to see you soon here on my blog. Have a great day.

♥ ATC Verrückte - ATC Adventskalendar - Day 23, Day 24 ♥

 Hallo Ihr Lieben,

ich wünsche Euch einen schönen Freitag und freue mich sehr, dass Ihr auch heute wieder hier auf meinem Blog vorbei schaut.

Heute gibt es den letzten Teil meiner ATC's welche für den Adventskalender bei den #ATC Verrückten Mädels entstanden sind.

 
Day 23
Bei diesem ATC habe ich den Weihnachtsbaum aus dem Christmas Dreams Set von Lawn Fawn verwendet und mit Stempeln aus dem Dandy Day Set kombiniert. Der Hintergrund ist mit Distress Oxides Tumbled Glass und Faded Jeans entstanden. Für den Schneehügel habe ich die Slimline Stitched Border Stanze verwendet. Koloriert habe ich die Motive mit Copics, ausgeschnitten und zum Teil mit Foam Dots aufgeklebt. Den Text habe ich mit dem Misti Tool direkt aufgestempelt. Zum Schluss habe ich noch drei Glitzersteine aufgeklebt.

Day 24
Für das letzte ATC meines ATC's Kalender habe ich das Ready, Set Snow Set verwendet. Bei diesem ATC habe ich für den Hintergrund Distress Oxide Mermaid Lagoon verwendet und mit einem Stencil und Embossingpaste die Schneeflocken aufgetragen. Den Text habe ich auf ein Banner aus dem Simple Wavy Banners gestempelt. Die Motive sind mit der Schere ausgeschnitten und mit Foam Dots aufgeklebt. Etwas Stickles Star Dust durfte bei diesem ATC auch nicht fehlen.
 
Hier ist nochmal eine Collage aller Adventskalender ATC's.
 Ich hoffe Euch hat der ATC Adventskalender gefallen, mir hat es auf jeden Fall grossen Spass gemacht die ATC's nur mit Lawn Fawn Stempeln und Stanzen zu gestalten. ich freue mich definitiv riesig auf den nächsten ATC Adventskalender.
 
Nun sage ich Danke für Euren Besuch, wünsche Euch noch einen schönen Tag und hoffe Ihr schaut auch morgen hier wieder vorbei.. Lasst es Euch gut gehen. Tschüssi bis bald.