Donnerstag, 29. August 2019

♥ Clearly Besotted - To My Foxy Friend Card ♥

Hi everybody,
I wish you a happy Thursday and I'm really glad to see you here again on my blog.

Today I show you a card with the Foxy Friend Stamp set from Clearly Besotted, which is one of my favorite stamping company.

For this card I create a background with the hill stamp from the Scene It Stamp Set and use the Distress Oxide Peeled Pain, Dried Marigold, Seedles Presere and Aged Mahagony for inking.
Then I use a Die from the Lawn Fawn Large Stitched 4 Bar Rectangles and cut it out. I glue it on a piece of Kraft Cardstock where I distressed all edges and then on my white card base.
I stamp my images and color them all with my Copics and fussy cut them out with my scissors. I stamp the sentiment, which is also from the Foxy friend Set, with my Misti Tool directly on my card. I arrange my images on the card. For some images I use some Foam Tape for a bit more dimension.

I'm really happy how the card looks like and I hope you'll like it also.

Many thanks for stopping by and I hope to see you soon here on my blog. Have a great day.

Montag, 26. August 2019

♥ Stamp Corner DT - Geburtstagskarte mit embosstem Hintergrund ♥

Hallo Ihr Lieben,
ich wünsche Euch einen schönen Montag und freue mich sehr, dass Ihr heute wieder hier auf meinem Blog vorbei schaut.
Heute zeige ich Euch auf dem Stamp Corner Blog eine neue Geburtstagskarte mit dem süßen Elefant mit Schleife.
 Obwohl ich jede Menge Designpapier besitze, liebe ich es ja den Hintergrund für Karten selbst zu gestalten.

Bei der heutigen Karte habe ich den Hintergrund mit dem Herzchenstempel aus dem Stamp Corner Stempelset Girls bestempelt und mit weißem Embossingpulver von Ranger heiß embosst. Wenn ich etwas heiß embosse verwende ich vor dem stempeln mit dem VersaMark Stempel Kissen das EK Tools Powder Tools, damit das Embossingpulver nicht auf dem ganzen Hintergrund bleibt. Nachdem der Hintergrund abgekühlt ist, habe ich ihn mit Distress Oxide Spun Sugar und Picked Raspberry und dem Crafts Too - 2 Mini Blending Tool eingefärbt. Dann habe ich den HG mit der Wonky Stitched Rectangle Stanze von My Favorite Things ausgestanzt und auf Kraft Cardstock geklebt, bei dem ich mit dem Crafts Too - Paper Distress Tool die Ränder aufgeraut habe. Als Grundkarte habe ich weißen Cardstock verwendet.

Den kleinen süßen Stamp Corner Motiv Stempel Elefant mit Schleife habe ich mit meinen Copics coloriert und mit einer runden Stanze von My favorite Things  ausgestanzt. Ihr könnt natürlich auch jede andere Stanze aus dem Shop verwenden. Zusätzlich habe ich noch einen größeren Kreis mit der My favorite Things Stanze ausgestanzt und das ganze dann mit Foam Tape mittig auf die Karte geklebt.

Für den Text habe ich einen Stempel aus dem Lawn Fawn Set Birthday before 'n After und die Simple Wavy Banners verwendet. Zum Schluss habe ich die Karte noch mit kleinen Holz Herzchen und Perlen dekoriert.
Ich hoffe Euch gefällt die Karte und ich konnte Euch etwas inspiriren.

Nun sage ich Danke für Euren Besuch und wünsche Euch noch einen schönen Tag. Tschüssi bis bald.

 
Materialliste

Donnerstag, 22. August 2019

♥ Clearly Besotted - Seasonal Tags ♥

Hi everybody,
I wish you a happy Thursday and I'm really glad to see you here again on my blog.

Today I show you some seasonal Tags with the All Four Seasons and Scene It Seasons stamps from Clearly Besotted. As I saw these cute little penguins for the first time,  I know that it would be great to create some seasonal tags with them.
  I use for all Tags the My favorite Things Stitched Traditional Tag STAX Die-namics. I color the images with my Copic Markers and use the Distress Oxides for the backgrounds.

For the Spring Tag I color the background with my Copic Markers.
 For the Summer Tag I use Distress Oxide Tumbled Glass for the sky and Antique Linen and Tea Dye for the sand. I also add some brown and white dots with my Copics on the sand.
 For the Autumn Tag I use the Dried Marigold, Spiced Marmalade, Seedless Preserves for the sky and Peeled Paint for the grass.
 For the Winter Tag I use Distress Oxide Tumbled Glass and Chipped Sapphire for the sky and Ice Spruced for the snow hills.
For the snow I use a stencil from Create a Smile and some Glimmer Paste.

So I'm really happy how the Tags looks like and I'll hope you like it also.

With my Seasonal Tags I'll take part of these challenges:


Many thanks for stopping by and I hope to see you soon here on my blog. Have a great day.

Mittwoch, 21. August 2019

♥ Neat and Tangled - Warmest Wishes Winter Card ♥

Hi everybody,
I wish you a happy Wednesday and I'm really glad to see you here again on my blog.

Today I show you a new card with the Neat and Tangled Merry Kisses Stamp set.

I create a Distress Oxide background with Tumbled Glass, Salty Ocean and Faded Jeans and let it dry.
If the background is dry I add some white splashes on it and let it dry again. In the meanwhile I cut out a snow hill with a die from Craftin Desert Divas.Then I cut out my background with the Wonky Stitched Rectangle STAX Die-namcics. I glue the snow hill on my background and then I glue all on my white card base. Now it's time to color the images with my Copic Markers, fussy cut them out with my scissors and glue them on my card. For more dimension I glue the cute fox couple and the little bird with Foam Tape on the card. For the sentiment I cut out a banner from Craftin Desert Divas Flag Banner Dies. For the final touch I glue some white sequins on my card.

 I'm really happy how the card looks like and I hope you like it also.
With my card I'll take part of these challenges:


Many thanks for stopping by and I hope to see you soon here on my blog. Have a great day.

Montag, 19. August 2019

♥ Stamp Corner - Zwei Shaker Cards mit Distress und Stencil Hintergründen ♥

Hallo Ihr Lieben,
ich wünsche Euch einen schönen Montag und hoffe, dass Ihr ein schönes kreatives Wochenende hattet.

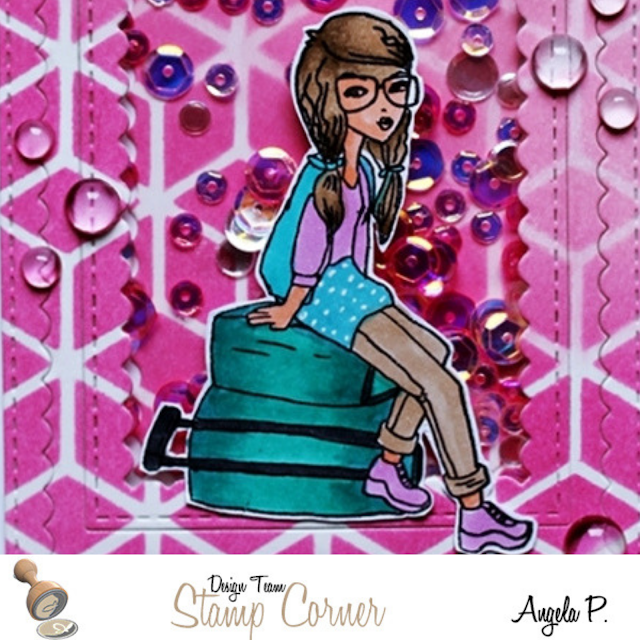
Ich zeige euch heute auf dem Stamp Corner Blog zwei Shaker Cards mit dem süßen Stamp Corner Girls Stempel Set.
Für die Shaker Cards habe ich die Hintergünde mit Stencils von Tim Holtz und verschiedenen Distress Oxides angefertigt.

Dafür habe ich ein Stencil von Tim Holtz auf ein Stück Cardstock gelegt und mit Washi Tap an der Seite befestigt (damit der Cardstock nicht verrutscht). Für die rechte Shaker Card habe ich mit dem Mini Blending Tool von Ranger den Cardstock mit Distress Oxide Tumbled Glass und Salty Ocean eingefärbt und für die linke Shaker Card habe ich Distress Oxide Spun Sugar und Picked Raspberry verwendet. Anschließend habe ich ein Stanze von My Favorite Things verwendet um das Shaker Element herzustellen. Dafür müsst Ihr eigentlich nur den mitteleren Teil nach dem stanzen auf Eurer Grundkarte positionieren und mit Sequins / Pailletten / kleinen Embillishments,etc. füllen. Dann klebt Ihr auf die Rückseite Eures gestanzten Rahmens etwas Folie / Acetate auf und für die Dimension etwas Foam Tape darüber. Damit die Sequins oder Pailletten nicht an dem Foam Tape kleben bleiben, verwende ich immer das Powder Tool von EK Tools und "pudere" damit sämtliche Ränder gut ein. Nun müsst Ihr nur noch das Shaker Element zusammenkleben und fertig ist Eure Shaker Karte. Bei der rechten Karte habe ich als Text einen Stempel aus dem Stamp Corner Set Freunde verwendet, auf ein Banner mit Memento Tuxedo Black gestempelt und auf die Karte geklebt. Bei der rechten Karte habe ich einen Text aus meinem Bestand verwendet. Nun könnt Ihr die Shaker Karte noch nach Herzenslust dekorieren. Ich habe einmal Sequins und einmal Clear Drops verwendet.

Die Motive habe ich mit meine Copic Marker coloriert.

Nach dem colorieren habe ich die Motive mit der Schere ausgeschnipplet und vorne auf die Karten geklebt.
Ich hoffe ich konnte Euch etwas inspirieren und Euch gefallen meine Shaker Cards.

 Nun sage ich Danke für Euren Besuch und wünsche Euch noch einen schönen Tag.Tschüssi bis bald.
 
Materialliste:

Dienstag, 13. August 2019

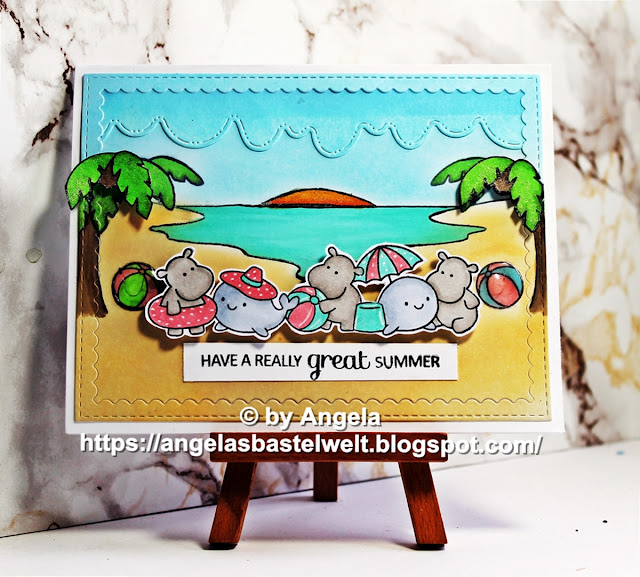
♥ Clearly Besotted - Have a really great Summer Card ♥

Hi everybody, 
I wish you a happy Tuesday and I'm really glad to see you here again on my blog.

Today I show you a tropical summer scene card with the cute Seasonal Line Up and the Scene It Seasons stamps from Clearly Besotted.

 I started with the mirror technique stamping technique to create my tropical summer scene. I stamped the Scene It Seasons stamp on a piece of Neenah Solar White cardstock and use the Distress Oxide Tumbled Glass, Dried Marigold and Tea Dye. 
For coloring my images I use my Copic Markers. Then I cut out my scene with the My Favorite Things Stitched Rectangle Scallop Frames Die-namics. I also cut out a piece of cardstock for the cloud border from Craftin Desert Divas, inked it with Tumbled Glass and glue it on my summer scene. Then I stamp the little Hippos from the Seasonal Line Up stamps, color them with my Copic Markers and fussy cut them out with my scissors. For more dimension I glue the Hippos with Foam Pads on the card. I stamp the sentiment from the Scene it more Stamp Set on a piece of cardstock and glue it on m card.

With my card I'll take part of these challenges:

Bastel -Traum CH: CH #79 Alles it möglich / Anything Goes

Many thanks for stopping by and I hope to see you soon here on my blog. Have a great day.

Montag, 12. August 2019

♥ Stamp Corner - Happy Summer Card ♥

Hallo Ihr Lieben,
ich wünsche Euch einen schönen Montag und freue mich sehr, dass Ihr heute wieder hier auf meinem Blog vorbei schaut.
 
Heute zeige ich Euch auf dem Stamp Corner Blog  eine sommerliche Karte, die mit dem Stamp Corner Stempel Set Maritim 7 entstanden ist.
Da in diesem Set viele kleinere Stempel enthalten sind, habe ich mir überlegt, mit den kleineren Motiven den Hintergund zu gestalten und das Schiff als Hauptmotiv zu verwenden.

Mit dem Gina K. - Amalgan Ink Jet Black Stempelkissen habe ich die Motive auf ein Stück Cardstock gestempelt.
Anschließend habe ich den Hintergrund mit Distress Oxide Tumbled Glass leicht eingefärbt und trocknen lassen. Dann habe ich eine Stanze von Avery Elle verwendet, um in der Mitte einen ovalen Ausschnitt zu erhalten. Den ovalen Ausschnitt könnt Ihr natürlich auch mit jeder anderen Stanze gestalten. Auf das mittlere Oval habe ich dann das Schiff gestempelt und mit meinen Copic Marker coloriert.Da ich den Hintergund auch mit Distress Oxides einfärben wollte, habe ich mir mit Maskierpapier eine Maske erstellt und aufgeklebt. Zum einfärben habe ich die Distress Oxide Stempelkissen Squeezed Lemonade, Dried Marigold, Picket Raspberry, Tumbled Glass und Salty Ocean verwendet. Für ein bisschen mehr Dimension habe ich das Oval mehrmals ausgestanzt und übereinander geklebt. Für meine Grundkarte habe ich die gleichen Distress Oxide Stempelkisen verwendet  und den gestempelten Hintergund mit dem Gina K. - Connect Glue aufgeklebt. Für den Text aus dem Lawn Fawn On the Beach Clear Stamp Set habe ich die Lawn Fawn Simple Wavy Borders verwendet und mit Foam Tape aufgeklebt.

Ich hoffe Euch gefällt meine Karte und ich konnte euch damit inspirieren.
 Nun sage ich Danke für Euren Besuch und wünsche Euch noch einen schönen Tag.Tschüssi bis bald.
 
Materialliste:

Samstag, 10. August 2019

♥ Sweet Stampers Challenge - Dies and / or Punches ♥

Hallo Ihr Lieben,
ich wünsche Euch einen schönen Samstag und freue mich sehr, dass Ihr heute wieder hier auf meinem Blog vorbei schaut.

Heute starten wir eine neue Challenge auf dem

 Diesmal haben wir uns folgendes Thema für Euch überlegt:

Ihr habt bis zum 08. 09.2019 Zeit Eure Werke auf dem Challengeblog einzustellen. 

Bei meiner Karte habe ich mich für eine Einhornkarte entschieden und dafür die Be a Unicorn Stempel und Stanzen von Avery Elle verwendet.
Den Hintergrund habe ich mit Distress Oxide Tumbled Glass gestaltet. Die Wolken habe ich mit der Craftin Desert Divas Stanze ausgestanzt und ebenfalls mit Tumbled Glass und Chipped Sapphire eingefärbt. Die kleine Wolke ist mit der Puffy Cloud Stanze ausgestanzt. Außerdem habe ich noch  die My Favorite Things Stitched Rectangle Scallop Frames Die-namics für den weißen Rahmen verwendet. Die Motive habe ich mit meinen Copics coloriert und anschließend mit den passenden Stanzen ausgestanzt und auf den Hintergrund geklebt. Den Text habe ich mit dem Misti Tool direkt auf die Karte gestempelt. Als Deko habe ich noch ein paar Shimmer Sequins verwendet.

So ich hoffe meine Karte gefällt Euch und ich konnte Euch etwas inspirieren um an unserer Challenge teilzunehmen.

Mit meiner Karte nehme ich an folgenden Challenges teil:
Nun sage ich Danke für Euren Besuch und wünsche Euch noch einen schönen Tag bzw. Wochenende. Lasst es Euch gut gehen. Tschüssi bis bald.


Donnerstag, 8. August 2019

♥ Mama Elephant - Sending You Lots Of Sunshine ♥


Hi everybody.
I wish you a happy Thursday and I'm really glad to see you here again on my blog.

Today I show you another summer card. For this card I use the Summer Splash stamps from Mama Elephant.

I started to create my card with inking a background panel with Distress Oxide Squeezed Lemonade, Barn Door and Tumbled Glass and let it dry. In the meanwhile I create my beach, I inked two pieces of Neenah Desert Storm cardstock with Distress Tea Dye and Antique Linen. I add some white, black and golden splashes on the cardstock and let it dry.
 Then I cut out my background with the largest Die from the Lawn Fawn Large Stitched 4 Bar Rectangle Dies and glue it on my white card base. Now I cut out the dry beach hill with a die from the Fall Border Dies from Craftin Desert Divas and with the largest Die from the Lawn Fawn Large Stitched 4 Bar Rectangle Dies and use the Lawn Fawn Sandy Beach Accents Dies. Now I stamp the images from Mama Elephants Summer Splash stamp set, color them with my Copic Markers and fussy cut them out with my scissors. I decided to use also the palm tree from Sunny Studio Designs. I stamp the sentiment from Mama Elephants Beach Chickies stamp set with my Misti Tool directly on the background. For the final touch I cut out a little sun from Craftin desert Divas Beach Scene Dies and glue  it with Foam Tape on my card. 

I'm really happy how the card looks like and I hope you like it also.

With my card I'll take part of these challenges:


Many thanks for stopping by and I hope to see you soon here on my blog. Have a great day.

Dienstag, 6. August 2019

♥ Stamp Corner - Sommerliche Geburtstagskarte mit Bär im Eis Stempel ♥♥

Hallo Ihr Lieben, 
ich wünsche Euch einen schönen Dienstag und freue mich sehr, dass Ihr auch heute wieder auf meinem Blog vorbei schaut.

Heute zeige ich Euch meine erste Karte als Designteam Mitglied von Stamp Corner.
Da wir ja immer noch recht sommerliche Temperaturen haben, habe ich mich für den kleinen Bär im Eis Stempel entschieden und eine sommerliche Geburtstagkarte gewerkelt.

Für den Hintergrund habe ich als ersten Schritt ein Stück Cardstock mit Distress Oxide Fossilized Amber eingefärbt. Nach dem trocknen habe ich das Rays Stencil von Tim Holtz über den Cardstock gelegt und die Sonnenstrahlen mit Distress Oxide Dried Marigold und Picked Raspberry eingefärbt, bis mir der Farbverlauf gefallen hat. Anschießend habe ich noch einen Halbkreis mit Distress Oxide Dried Marigold und Picked Raspberry eingefärbt und mittig auf den Hintergrund geklebt. Den Hintergund habe ich dann auf schwarzen Cardstock  und auf meine weiße Grundkarte geklebt.
Den Bär im Eis Stempel habe ich mehrmals auf das Perfect Colouring Paper gestempelt und mit meinen  Copics coloriert. Anschließend habe ich die süßen Bären mit der Schere ausgeschnippelt und mit dem Gina K.- Connect Glue aufgeklebt. Den Spruch (aus meinem Bestand) habe ich dann in den Halbkreis gestempelt und mit ein paar Pailetten dekoriert. Zum Abschluß habe ich noch ein paar Tropfen Nuvo Crystal Drops Grande - Morning Dew auf die Sonnenstrahlen aufgetragen und fertig ist meine sommerliche Geburtstagskarte.

Ich hoffe Euch gefällt mein Einstandswerk und ich konnte euch damit etwas inspirieren.

 Nun sage ich Danke für Euren Besuch und wünsche Euch noch einen schönen Tag.Tschüssi bis bald.
 

Montag, 5. August 2019

♥ AAA Birthday Challenge - Game 4 / For the Boys ♥

Hi everybody,
I'm here again with another new card.

Today we start a new challenge at
AAA Birthday Challenge 
For this challenge we choose the theme
For The Boys

For my card I use the Jungle Littles stamps from Hello Bluebird.
At first I create my background with Distress Oxide Cracked Pistachio and Lucky Clover. If it's dry I use a leaf stencil, lay it over my background and inked the background with Mowed Lawn. Then I cut our a frame with Neenah Desert Storm cardstock and use the My Favorite Things Stitched Rectangle Scallop Frames Die-namics. I glue all on my white card base. Now I stamp all images , color them with my Copic Markers and fussy cut them out with my scissors. I glue them with liquid glue from Lawn Fawn on my card and for a bit dimension I use for some images Foam Tape. On three flowers I glue a brown rhinestone. For the sentiment which is also included in the set I cut out a small cardstock piece and glue it on the top of my card.

So I'll hope you like my new card and I could inspire you a bit to join our new challenge.

With my card I'll take part of these challenges:


Many thanks for stopping by and I hope to see you soon here on my blog. Have a great day.

♥ Gastdesign Stempelgarten - Sonne, Strand und Meer ♥

Hallo Ihr Lieben,
ich wünsche Euch einen schönen Montag und freue mich sehr, dass Ihr heute wieder auf meinem Blog vorbei schaut.

Heute startet eine neue Challenge auf dem Blog von 
Stempelgarten Challenge

Logo
Das Thema für die August Challenge lautet:
Sonne, Strand und Meer 
 Da ich bei der letzten Challenge als Top 1 ausgewählt wurde, darf ich das Team heute als Gastdesigner unterstützen. *juchu*

Für den Gewinner gibt es ein Bastelset im Wert von über CHF 20.00 zu gewinnen.
Ich habe für meine Karte das Stempelset Smooth Sailing von Lawn Fawn verwendet und eine Interaktive Karte gewerkelt.
 Für den Hintergrund habe ich die Distress Oxides Fozzilized Amber, Dried Marigold und Picked Raspberry verwendet. Außerdem habe ich Stanzen von Lawn Fawn und My favorite Things verwendet. 

Mit meiner Karte nehme ich an folgenden Challenges teil:

CCC Digi Creations: CH #106 Summer

Lemon Shortbread Challenge: CH #99 Anything Goes

Crafty Friends: CH #115 Summer Colours

 Nun sage ich Danke für Euren Besuch und wünsche Euch noch einen schönen Tag.Tschüssi bis bald.


Freitag, 2. August 2019

♥ Creative with Stamps - CH #41 Dad / Masculine ♥

Hi everybody,
I'm here again with another posting for today.

Yesterday starts a new challenge at the

Creative with Stamps Challenge 

 
For this challenge we have the theme

Dad or Masculine

For my card I use the Happy Camper stamp set from Craftin Desert Divas and make a Distress Oxide background.
I create the background with Distress Oxide Blueprint Sketch, Faded Jeans, Wilted Violet and add some water splashes on the background. After the background is dry I cut it out with the Inside Scalloped Rectangle Dies.
Then I create a grass border with Distress Oxide Mowed Lawn and add also some water splashes on the inked cardstock. When it is dry I cut it out with the Outdoor Landscape 2 Dies and glue it on my background. I stamp the images on a piece of Copic paper, color them with my Copics and fussy cut them out with my scissors. For a bit dimension I glue the images with Foam tape on my card.   I stamp the sentiment with my Misti Tool directly on my card. Then I glue all on my card base and glue some little stars and a moon on the sky.

So I'll hope you like my new card and join our new challenge.

With my card I'll take part of these challenges:


Many thanks for stopping by and I hope to see you soon here on my blog. Have a great day.